Installation of a concrete fence: how to make the
It is no secret that the fencing of the site should be durable and preferably beautiful. For the manufacture of such fences today are widely used sections of steel, as well as from concrete.
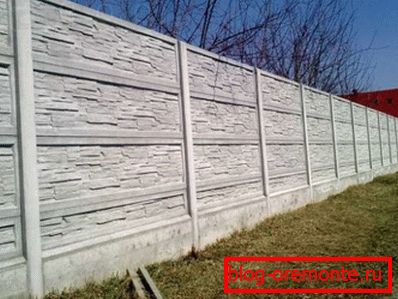
What is good about the last option is that at a quite reasonable cost you will get not only a neat and beautiful fence (you can paint it in any color), but also a really durable one.

In this article, we will deal in detail with how the installation of a concrete fence is done with your own hands.
Only here it is necessary to understand that there is not one technology for the installation of this design. Let's take a look at what kind of double-sided concrete fence you can do at all, and then decide on the easiest way and implement it in practice.
What are concrete fences

By way of installation, concrete fences can be divided into two conditional categories, which are detailed in the table below.
| Fence type | Special features |
| 1. Monolithic construction.
| In principle, such a fence on concrete tape is very good - first of all, because it is very durable and durable. However, installing the formwork and pouring the mixture into it is a laborious and, most importantly, long process. |
| 2. Sequential construction. | In fact, it is quite simple and convenient technology. Its meaning is that poles are installed along the perimeter of the site, in the structure of which there are special grooves. Fence concrete slabs are then inserted into these slots. |
As you can see, a more attractive and convenient installation option is the assembly of a sectional construction. We will take this technology as a good example.
Please note that the price of both technologies is about the same. The differences consist mainly in that more time and effort is spent on the first option.

And a few words about the device base under the sectional concrete fence.
How to make a foundation
Consider all the details.
| Base Type | Advantages and disadvantages |
| 1. Ribbon foundation.
| This option, of course, is good in that the lower line of the concrete section will closely adjoin the horizontal plane of the tape. That is, the clearance between the sections and the ground will be minimal. However, the price of a ribbon base is rather big. |
| 2. Column base. | The essence of the method is that the columns are inserted into the holes dug in advance, and then all the free space is filled with concrete. Cheap, fast and practical. However, in this case there will be a gap between the ground and the lower section of the fence. |
So what we have.
It turns out that the ribbon concrete foundation for the fence is a good thing, but expensive. But the second option - when the columns are digging in and poured with a small amount of the mixture - this is the best option. We will consider it in practice.

Tip: if you still need to get the minimum clearance between the sections and the ground level, and there are no funds for the capital tape base, then you can cheat a little. Make a column base, and between the supports lay out a few rows of red brick horizontally. And it will turn out cheap, and there will be no gap.
Let's start.
Installation of the fence step by step
Before you make a concrete fence with your own hands, you must, of course, mark everything up, that is, decide where the supports will stand, calculate the distance between them so as to minimize the trimming of the sections.
This is what we do first.
Layout and draft work
The markup is done very simply and in this order:
- The angles or extremes of the future fencing are determined. Pegs are hammered in these places.
- Between the pegs you need to tighten the construction thread - it will be a guideline of the smooth fence line.
- After that, depending on the width of the sections (since the forms for concrete fences for casting sections are used are very different, then some one standard size does not yet exist) the distance between the supports is determined. Then, with the help of a tape measure, the marking of all intermediate pillars is done and pegs are also driven in at these points.

- The thread is removed and in those places where the pegs are set, dig holes 50 centimeter deep. As for the diameter of the pits, it should be slightly larger than the thickness of the pillars.
Note that sometimes instead of digging holes, a special drill for the ground is used. But if it is used, then concreting is not needed. Because concrete will simply have nowhere to fill. As a rule, holes are drilled under the pillars when there is no need to make a perfectly flat fence (concrete allows you to adjust the supports vertically as accurately as possible).
If done, you can move on.
Installing the supports and insert sections
Installation of the pillars must begin with the concreting of two extreme or all corner supports. Thanks to this approach, it will be possible to make the fence line as smooth as possible.
The order of work here is something like this:
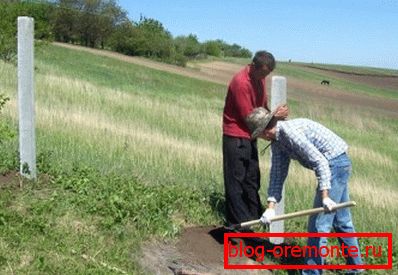
- Install extreme or angular pillars in the pits. At the same time, we try to immediately insert them as smoothly as possible (the smoother they will be initially, the easier it will be to adjust them later in the mass of concrete).

- Knead the solution of sand, water, cement and gravel. It is necessary to make the mixture thick.
Pay attention that you should not use expanded clay for concrete preparation. Crushed stone is inert and repels water, which means that the foundation of concrete on the basis of crushed stone will last an order of magnitude longer than claydite.
- We wrap the walls of the pit with ruberoid. It is needed here in order to protect the concrete base as much as possible from moisture. After all, the less moisture gets into the concrete structure, the less it will collapse.
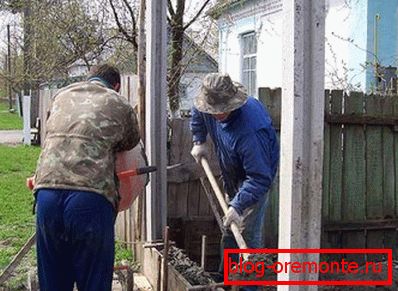
- Fill the mixture with all the free space between the walls of the pits and pillars.

- We adjust the correctness of the vertical position of the supports using the level.
Tip: Try to use at least a two-meter level - it will allow you to more accurately set the vertical. Short levels capture only a small part of the column, and the support is not always evenly cast. And it turns out that due to the presence of curvatures at certain points to which a level can be attached, it is possible to incorrectly set a pillar.
Be very careful at this stage - after all, all intermediate posts will be exposed to the extreme supports.
- When the concrete around the extreme supports harden, we stretch two threads between them - on the top and on the bottom. This will be a guideline for adjusting all remaining columns.
- We put all the pillars in turn, fill them with concrete and adjust them relative to the threads.
- When all the concrete completely hardens (you need at least 10 days, you can not wait so much, but then there will be a stronger shrinkage of the structure, and this is fraught with deformation), you can insert concrete slabs for the fence into the slots. First, all lower sections are inserted, then the middle sections, and then the upper sections. Well, if there is only one plate in one span, then, accordingly, you need to move from right to left or vice versa.

In general, that's all. How to install a concrete fence from the sections - we reviewed step by step.
Let's summarize.
Conclusion
It turns out that the concrete cover on the fence - this is an excellent material for the device fencing. Moreover, it is the fastest and relatively simple technology for installing a durable stone fence.
We figured out what is this method of assembly, and compared it with other methods. We hope that the instruction will be useful to you in practice. Well, if you want to learn more about this topic, we recommend that you view the additional video in this article.