How to pour concrete floors with your own hands - from
Concrete floors are a practical solution, as they have exceptional strength and durability. In addition, such a floor is quite capable of being performed by every home craftsman; the only thing is that it is necessary to strictly observe a certain technology. Therefore, we will consider in detail how to make a concrete floor by yourself.

Pouring concrete floors
Materials
Before you start pouring, you must prepare the following materials for concrete floors:
- Components for concrete;
- Reinforcing mesh;
- Polyethylene film;
- Lighthouse profile to install beacons.

Preparing the floor for pouring
Work begins with the preparation of the base.
To do this, follow these steps:
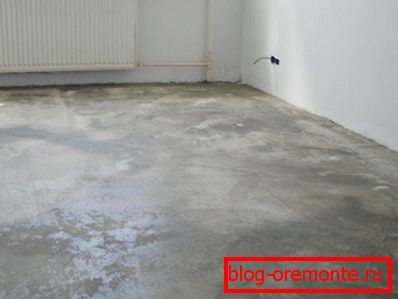
- The first step is to remove debris and dirt from the base.
- Then around the perimeter of the walls is glued damper tape.
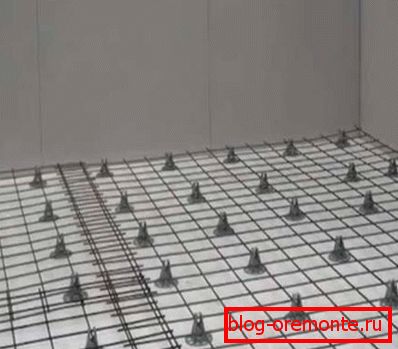
- Next on the floor is laid plastic film with the plant on the wall to a height of about 250 mm. In the joints performed overlap about 300 mm.
- After that the reinforcing mesh is laid. It should be located in the thickness of the concrete, so under the grid should be placed stones of suitable sizes or wooden bars. For example, if you plan to perform a screed thickness of 10 cm, then the grid should rise above the floor by 5 cm.

Installation of beacons
Separately, it should be said about the installation of lighthouses with their own hands, since this work needs special care and attention. The quality of their installation depends on how smooth the floor will turn out.
So, installation is performed in the following order:
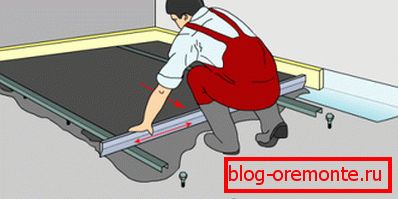
- At a distance of about 25 cm from the wall, two screws are screwed into the floor, as shown in the diagram. Their caps should be located at the level of the surface of the future screed.
- Then the lighthouse profile is laid on the caps of the screws and its position is checked by the building level. To eliminate deviations from the horizontal, you should twist one of the screws a little.
- Then, lumps of gypsum cement are placed between the screws, and the profile is sunk in them so that it lies on the screws.. After this, the position of the slats should be checked again by level. Thus, the fixation of the beacon is performed.
- Further, the rake is also installed near the opposite side of the wall.. At the same time, it is necessary to make sure that both beacons are in the same horizontal plane. For this, the threads are stretched between them, and their position is checked by the building level.
- Then the remaining lighthouses are installed along the lines.. The distance between the slats must be less than the length of the rule. As a result, all guides for the concrete floor should be in the same horizontal plane.

Concrete preparation and floor casting
It now remains to prepare the concrete and perform the screed. To do this, you need the following components:
| Cement M400 | One part |
| River washed sand | Three parts |
| Rubble or gravel | Five pieces |
| Water | Part floor |
Tip! In addition to the above components, the composition can add a plasticizer, which will improve the performance characteristics of concrete.

Instructions for preparing the solution is as follows:
- First of all, cement and sand should be poured into the concrete mixer.
- After mixing the dry ingredients, water is added.
- Then the solution is mixed and crushed stone or gravel for concrete is added to it.
After the concrete is ready, the concrete floors are laid. The procedure must be started from the door opposite to the entrance. Fill the floor should be segments, i.e. strips between the slats.
The surface of the concrete is aligned with the rule, which stretches along the slats towards itself. After pouring one span, you can move on to the next, and so on until the end of the room.
A few hours after pouring, grouting the surface with wooden float is done. This allows the screed to be smoother and stronger.

It must be said that to obtain a qualitative result, it is necessary to know not only how to properly pour concrete, but also how to dry the concrete floor. The most important rule - the solution should freeze evenly. Therefore, during the first ten days the surface should be periodically moistened with water.
A full set of design strength of concrete comes after 28 days. After that, the floor can be exploited.
Tip! Concrete is not necessary to make yourself. You can purchase ready-made solution from specialized firms. True, the price of the material in this case will be slightly higher.
Repair concrete floor
One of the main features of the concrete floor is that it can be repaired. Therefore, if the old screed eventually became useless, it is not necessary to fill in the new floor, most likely it can be repaired.

Surface leveling
If irregularities appeared on the surface of the screed, then the concrete should be pierced before laying the finishing floor covering. To do this, you can use polyurethane or epoxy putty, or other composition intended for this purpose.
If on the surface there are serious flaws, for example, chips or cracks, then you should use cement mortar.
Before filling the hole in the concrete floor, it is necessary to prepare the surface:
- First, peeling and crumbling areas are removed. If we are talking about a small crack, it is necessary to expand and deepen it.
- Then the damaged area is cleaned from dust and dirt;
- Further, before repairing a hole in the concrete floor, the damaged area should be treated with a primer with a paintbrush.
After the surface has been prepared, cement mortar is applied to the damaged area and leveled with a spatula.

Making wooden floor on top of screed
If the old screed has become dusty and cracked, the installation of a wooden floor can be considered as an option to eliminate this problem. In this case, lag is laid on a concrete floor, to which wooden boards are fastened with screws or nails.
Before installing logs on a concrete floor, it is also necessary to remove the garbage and, if necessary, level the base. Installation of the log is carried out using screws and anchors.
After fixing the log, the installation of boards, starting from the corner of the room. It is necessary to leave a distance of about 15 mm between the boards and the wall. This gap will disappear under the baseboard.
Conclusion
The procedure for pouring concrete floor is relatively simple. The only difficulty that may arise is the installation of beacons. However, following the above instructions, even an inexperienced master will be able to cope with this task. From the video in this article, you can get more information on this topic.