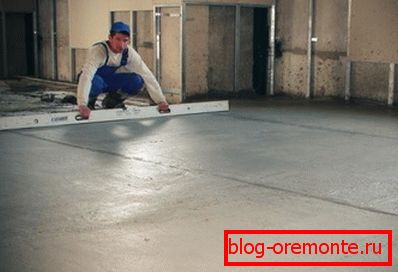
How to make a concrete screed: types of reinforcement.
Any floor covering requires a smooth and durable base. In turn, the most reliable basis, according to most experts, is a concrete screed. Its arrangement, as a rule, does not cause serious difficulties and any person possessing initial skills in construction can cope with this work. But before you make a concrete screed with your own hands, it is still worth getting acquainted with the subtleties of the process.

What it is
The tie is called the arrangement of the monolithic structure based on a concrete or other previously prepared base.
It can be performed both in residential buildings and in industrial premises.
- As the name implies, the device of the concrete screed can be made of cement-sand mixture, some types of cellular concrete or specially prepared, self-leveling compositions. We will focus on the most simple and affordable way, namely, the instructions for pouring cement-sand mixture will be considered in detail.
- This type of work is referred to as “wet”, as cement-based liquid solutions are used for pouring. Immediately I want to prevent the work physically quite heavy and rather dirty, but technologically simple.

What are the screeds
These designs are conventionally divided into 2 types.
- The most common type is considered to be bonded screed. It is poured on a solid, as a rule, concrete base, previously treated with deep penetration soil. It is considered the most reliable.
- Structures with a separating or insulating layer provide for the arrangement of some kind of separation gasket between the solid base and the liquid solution. It can be various kinds of coating, roll materials or heat insulation for installing underfloor heating.
The strength characteristics are somewhat lower here, hence the minimum fill thickness is 30 mm, with mandatory reinforcement.
Types of reinforcement
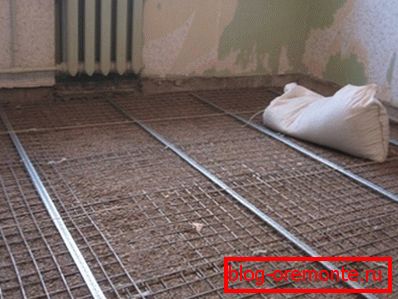
Until recently, all such structures were reinforced with a metal mesh only. Depending on the thickness of the fill, the wire section and the size of the cells are selected.
This method is still most preferred when a concrete screed is reinforced on the street with its own hands.
- Due to the metal grid, the load on the floor surface is distributed more evenly and this floor is able to withstand a fairly large mass.
- A more modern method is fiber reinforcement. This synthetic fiber, made on the basis of polymers, is rather light, having high characteristics of strength and elasticity. It can be laid in the form of a grid or added to the solution as a binder additive. In the latter case, the instruction must be strictly observed, since if there is an error in proportions, the concrete will crumble.
Tip: when arranging structures in residential buildings with a relatively small operating load, it is better to use fiberglass. Plus the price of this fiber is many times lower than the metal mesh.

Mounting technology
Before you make the concrete screed, you should thoroughly prepare. First of all, you should have a rule, preferably with a level. Laser level or liquid level, metal or plastic beacons, and of course a tool for solution preparation.
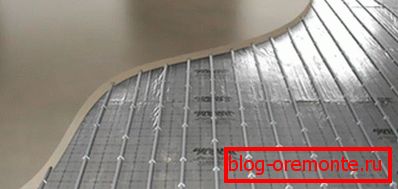
Preparatory work
First of all, you need to explore the very foundation of the future sex. If you are dealing with concrete slabs, on which there are minor irregularities, then it may make sense to use self-leveling compounds.
The price of them is certainly higher, but there is no need to arrange the lighthouses and the time will be spent much less.
Instructions for pouring is always on the packaging mix.
- In the case when the old screed is on the floor, it is better to knock it down. The fact is that even if it is strong enough, pouring new construction over the old one, the ceiling height will be lower, and for most of our apartments this is relevant.
- For wooden houses and in the arrangement of a warm floor, you will definitely have to lay a layer of reliable waterproofing, plus such a structure should be reinforced.
- Next we will consider the option of pouring a screed on a concrete base.. After the surface is cleaned from dust and debris, it needs to be covered with deep penetration soil, preferably 2 times.
Important: it is better to take the soil with waterproofing properties, plus large cracks, especially along the perimeter, you need to reliably seal up the sealing putty. In order to subsequently protect themselves and their neighbors from the bottom of leaks.

Markup
The next important step will be the markup.
Before leveling the concrete screed, you need to mark the level by which it will be leveled.
- The simplest, reliable and convenient option is to use a laser level. By simple operations around the perimeter of the room, the fill border is marked. But this device is expensive and for a small amount of work, it makes no sense to buy it.
- An inexpensive liquid level, operating on the principle of communicating vessels, is more common. For convenience of work, first on the walls around the perimeter of the room, you can draw a horizontal line at a height convenient for you. After that, with the help of roulette and rules, this border should be moved to the desired height.
- Remember that the minimum fill thickness relative to the highest point of the floor must be within 7 mm. If the height differences are significant, then in order to reduce the cost of the work, you can first make a rough concrete screed. As a filler, crushed stone is used for the street, light and warm expanded clay is used for living quarters.

Installation of beacons
Qualitatively level the surface of the floor, not using beacons, can only high-class professionals.
With lighthouses, this work is available to almost everyone.
Important: after the base is covered with soil and work on sealing. Before installing the beacons, we advise you to lay a reinforcing mesh, preferably at some distance from the floor. To lift it, you can use pieces of ceramic tiles or other similar material. A damper tape is mounted around the perimeter.
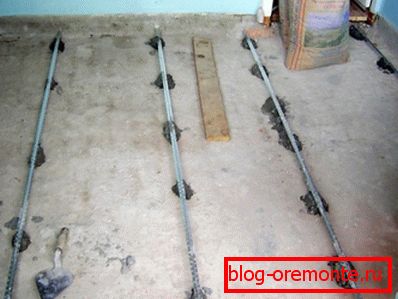
- Lighthouses are called T-shaped profiles, for the floor it is better to use metal structures with a corrosion-resistant coating. The point is that the upper limit of the profile corresponds to the level of the floor. The rule relies on lighthouses and grinds the solution, making the floor perfectly level.
- Profiles are convenient to install with screws. To do this, approximately in 1m increments, holes are made in the floor into which the dowels are pushed and the self-tapping screws are screwed, on which the bar is installed. Twisting and twisting self-tapping screws you can easily set the bar on the horizon.
- Further, the plank is fixed with the help of “tortillas” from the same cement-sand mortar or alabaster with a step of about 30 cm. The distance between the beacons should be 100 to 200 mm less than the dimensions of your rule.
Preparation of the solution and pouring

- As mentioned earlier, the screed is made on the basis of cement-sand mortar, cement is taken brand 400, it is better to use career sand. A big plus would be the use of special plasticizers, which will improve the quality characteristics of the coating.
- Traditionally, cement is combined with sand in a 1: 3 ratio and is well mixed. For kneading, ideally it is better to use a concrete mixer. But in its absence, you can use the mixing nozzle on the drill and a large capacity.
Note! Experts do not recommend kneading the solution manually, thus it is impossible to achieve a homogeneous composition.
- After the solution is ready, it is laid out between the beacons and leveled with a trowel or shovel. Finishing is done by tightening the solution with the rule of beacons. The tool needs to be moved slowly, in zigzag movements. Begin pouring from the far corner opposite the entrance door.
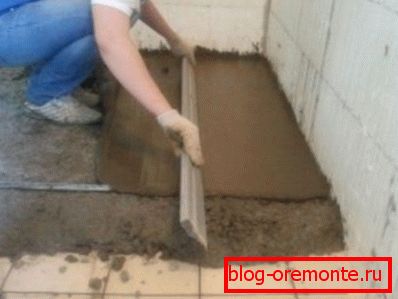
Important: often the question arises how to reinforce the concrete screed. In addition to internal reinforcement, experts advise to iron the surface of the floor. This is done simply, a wet solution, after finishing the alignment sprinkled with a thin layer of dry cement. The cement gets wet from the solution and after drying a thin but strong film is formed.
- After about a day, the solution will set, and after 2 - 3 days it will be possible to walk on it. But the final strength of the screed pick up within 28 days, only after this time it will be possible to mount the topcoat. And throughout this time, especially in the first week, the surface should be regularly moistened.
The video in this article shows the details of the arrangement of the screed.

Conclusion
I would also like to note that it is desirable to perform all the work in one day, so that there are no joints between the fills, on which cracks can subsequently form. We recommend to perform the device of the concrete screed paired with an assistant, while you level the mortar with the rule, he will prepare the next batch of mortar (learn here how to make a concrete septic tank on a country site).
