How to lay the paving slabs on a concrete base
Every year the landscaping with the help of paving tiles becomes popular. It is laid everywhere, in country houses, in city courtyards, playgrounds, parking lots and of course in private construction.
Laying paving slabs on a concrete base, occupies a special niche. It is used in places where increased stability and durability is required, but this does not mean that it cannot be laid with your own hands.
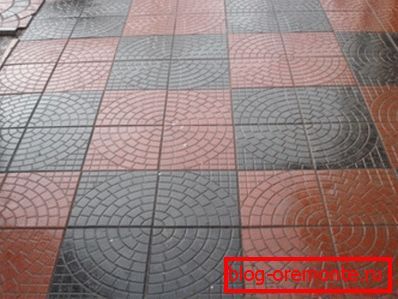
Advice: laying paving slabs on a concrete base is a laborious task that requires attentiveness, certain professionalism and some costs. Therefore, leave large areas of parking lots to professionals. But you can improve the blind area near the house or a small courtyard yourself.
What is this method good for?
The technology of laying paving slabs on a concrete base allows you to equip road surfaces exposed to severe loads.
In addition, this method is good because such a track, if properly laid, will serve much more than with traditional arrangement of rubble and sand.
- The fact is that with traditional styling, the base must be tamped down well enough. But as it does not tamper, under load, in any case, it sags or shifts in some places. Concrete monolith is devoid of this disadvantage.
- If you decide to lay the pavement, then you need a concrete pad with good waterproofing.
- Technology laying paving slabs on a concrete base, according to experts, is indispensable for arranging the coating on heaving soils. Winter frosts and related movements of the soil of a monolithic slab are not terrible.
- By itself, the instructions for laying on a flat plate with their own hands is simple. The main thing, before putting the paving slabs on a concrete base, is to ensure good drainage and drainage. Monolithic base does not let moisture, in the winter or in the off-season it can be dangerous.
Technological stages of installation
Как говорилось ранее, обустройство дорожки на бетонной плите считается более сложным процессом, чем монтаж на песчано-гравийную подушку. В случае несоблюдения технологии, демонтировать такую конструкцию будет проблематично (читайте также статью «Канализация из бетонных колец: рекомендации по строительству»).
Marking and site preparation
All such work begins with markup. For this, wooden or metal pegs are used, on which the marking thread is fastened, a landmark.
Quality of laying will depend on accuracy of a marking in many respects.
- Special attention should be paid to the slope of the track. Traditionally, the slope is in the range of 1 - 3 ?, 1 meter, for ordinary surfaces. And up to 5? when mounting the blind area.
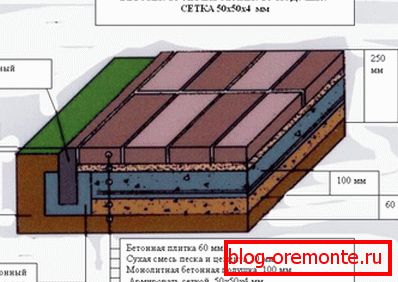
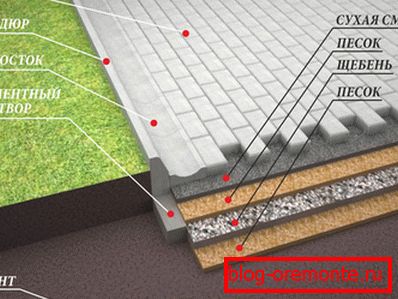
- For marking, excavation is done. The total size of the road "pie" will be about 400 mm. From here, the depth of excavation is calculated, taking into account that the path must be higher than the ground, plus a slope for drainage. On average, it is about 20 - 25 cm.

Curb setting
Before you lay the paving slabs on a concrete base, you need to equip the base itself, and this construction is heavy and multi-layered. Most experts advise to start with the installation of borders.
They will play the role of natural formwork.
Otherwise, you will need to mount the formwork and after installing the track, still install the curb.
- The trench under the curb is excavated below the level of the main masonry. As a rule, the trench depth is about 30 cm below the bottom of the curb block. The depth calculation should be made on the assumption that the top edge of the block is mounted 20–30 mm below the track level. It is necessary that the unit does not interfere with the outflow of water.
- Initially, rubble is poured into the trench to the level of 100 - 200 mm and is well rammed. After that, the solution is poured to a thickness of up to 20 mm and the block itself is installed. After a day, when the cement grabs, you can begin the construction of the track.
Tip: when marking is done, pegs should be driven in as often as possible. Keep in mind that even with a good stretch of strong thread, sagging for 1 meter will be 1 mm.
Construction of a concrete base
After excavation, the surface is carefully leveled and compacted, taking into account the slope.
At the bottom you can lay 1 - 2 layers of geotextile, according to the technology, it is necessary to protect against the germination of greenery, but in our opinion, greens will not break through the concrete slab.
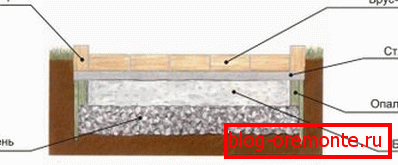
It is important: if the blind area around the perimeter of the building is equipped, to improve waterproofing, the bottom should be covered with roofing material in 1 - 2 layers.
- The bottom layer is filled with rubble on a thickness of 150 - 200 mm. Rubble should also be well tamped.
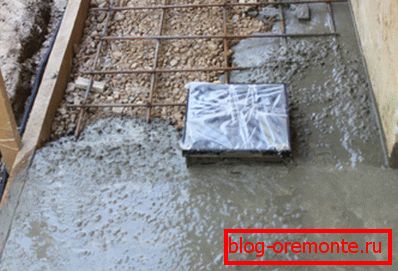
- If it is planned to install the coating under heavy loads, then a reinforcing cage is laid on the rubble pillow, with a rod cross section of about 10 - 12 mm. For a wide pedestrian walkway, you can use a chain-link. Narrow paths and adjoining blind spots can be not reinforced at all.
- The thickness of the monolithic layer for parking lots with heavy vehicles or other similar structures, can reach up to 200 mm. On the footpath 100 - 150 mm are enough.
- Concrete is usually used brand M100 - M200. The higher the grade of concrete, the faster it will harden and the longer it will stand, but its price will also be much higher. The table shows the basic proportions of bookmarks for different grades of concrete.

Important: in large areas, it is necessary to make damper joints to compensate for the stresses. On average, every 2.5 - 3m ?.
Laying tiles
The answer to the question - how to lay paving slabs on a concrete base, is quite simple. In a nutshell, the process is similar to tile installation.
The only difference is that the pavement can be mounted on a wet solution of sand with cement, on a dry solution of sand and cement in the same proportion or on a special construction glue.
- When dry laying, there is a significant shrinkage, so more professionals work with this mixture. The price of construction glue is quite high. The most cost-effective option is a cement-sand mortar.
- In this case, the solution is prepared without the addition of rubble, from sifted sand and cement. Mark is an order of magnitude higher than on the underlying monolith and a little thicker.
- At first it is better to lay the tile dry, cut out and number the edges with complex details. For the pattern is used, cutting of reinforced concrete with diamond circles. In the case when you need to drill a technological hole, then diamond drilling of holes in concrete is used.
- A mortar of 20–30 mm thick is laid on the concrete base with a trowel and tile is installed. Tight fitting is done with a rubber mallet. For arranging a gap of 3 - 5 mm, plastic crosses are used. It is important to immediately control the bias.
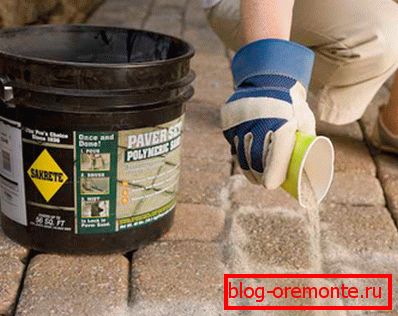
- After setting the solution for 2 - 3 days, the gaps between the blocks with a broom are filled with sifted sand. A week later, when the sand is compacted, the gaps between the tiles are rubbed with mortar.
Conclusion
Если вы все же решили укладывать покрытие на сухой раствор, то толщина отсыпки также делается в районе 30 мм. Но здесь времени на усадку нужно давать не менее 3 недель. Только после этого можно затирать швы между блоками (см.также статью «Мелкозернистый бетон – особенности и приготовление раствора»).
On the video in this article you can learn some technological moments for yourself.
