How to lay laminate on a concrete floor: classification and
In this article we will talk about whether it is possible to lay laminate on a concrete floor and how to do it correctly. Moreover, we consider the main features of this flooring and how they affect the subsequent operation of the finished floor.
The topic of the article is of considerable interest, since in most of the finished apartments and houses the floor is an ordinary concrete screed. Of course, you can run a subfloor and lay laminate on top of it. But this solution is fraught with additional expenses and therefore we will try to install directly on the coupler.

Before laying laminate flooring on a concrete floor, we will determine the main varieties and characteristics of this material.
Main varieties

The choice of laminate flooring is largely determined by the wear resistance of the material. In order to facilitate the search and purchase of materials in accordance with this parameter, a laminate classification system has been developed.
In the end, seeing the marking of the floor covering, you can understand what class the product belongs to, how reliable it is and how long it will last without losing the original performance characteristics.
Classification according to wear resistance

The laminate class is marked with a numerical designation, where the first digit indicates the type of room in which the product can be used, and the second indicates the degree of maximum permissible mechanical load.
For example, if the first digit in marking 2, then this means that the coating is suitable for individual use. If the number 3 is indicated, then laminate can be used in public buildings.
The larger the indicator displayed by the second digit, the more wear-resistant the floor covering you have chosen.
The minimum class suitable for use in a residential area is displayed as 21. If the room in which the repair is to be performed is designed for a large number of people at the same time, lay laminate with the designation 23 and above onto the floor.
Class 31 corresponds to materials intended for commercial use. The price of such material is higher than the cost of modifications intended for domestic use, but such a difference in price is fully justified if you do not intend to change the flooring over the next 10 years.
Connection Features
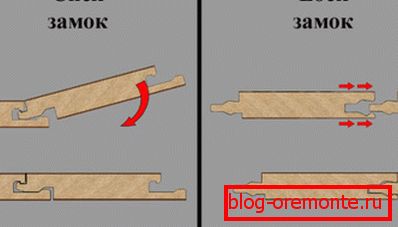
Equally important is the correct choice of the type of locking connection.
At the moment there are several types of laminate on sale, which, according to the method of connecting the panels, are divided into the following categories:
- Adhesive bonding due to its complexity is rarely used.. Another distinctive characteristic of such a connection is the complexity of the repair of the finished floor covering, since it turns out to be completely non-separable.
- «Click "or" double lock "- it's pretty common method of connection. The relevance of the coating with this type of connection is explained by the ease of installation and reliability of the finished result. Moreover, if you wish, you can always disassemble the finished floor in order to repair the damaged board. When assembling the floor, each new panel is applied to the already laid panels at an angle of 30 degrees. Then you need to rotate the nested panel in a horizontal position and the lock clicks. Dismantling is carried out in reverse order.
- "Lock" is another type of lock connection.. Installation of such laminate is simple and even a non-professional can cope with its implementation. However, in comparison with the previous castle connection, in this case, the finished result is of low strength. This lock is of a rotary type, as in the previous case, and one panel is driven into the other in the horizontal direction.
Important: Installation of laminate with locks of the “Lock” system requires special care, since inaccurate strikes on the locking part can lead to their breakage.
Features of the installation work
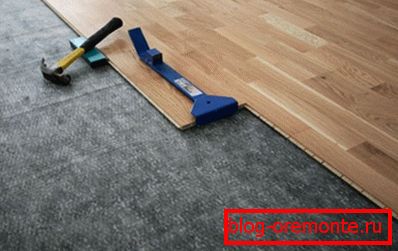
Installation instructions are not difficult if you choose the right materials and carry out all the work in accordance with the technological guidelines and recommendations of the manufacturer.
Installation works are performed in stages, and the quality of the finished result depends on the observance of the sequence of the stages. We will tell you more about each of these stages.
Preparatory work
Before the installation, the concrete base must be carefully leveled, and cutting of reinforced concrete with diamond circles or the use of special leveling compounds can help us in this. The protruding relief is cut or knocked down, while we fill the hollows of the concrete.
After the leveling mixture is completely dry, thoroughly clean the floor surface from dirt and dust. Then on the leveled concrete base of the floor we apply a strengthening penetrating dedusting primer of deep penetration.
The advantage of this treatment is that the base on which the installation will be carried out will become hydrophobic, strong and more durable, even if diamond drilling of holes in the concrete was done before.
Important: You can proceed with the subsequent work only after the primer has completely dried, which may take 1-2 days.
Mounting technology
- After the concrete base is prepared, we line the waterproofing to eliminate the likelihood of dampness of the back side of the laminate. As an inexpensive waterproofing, you can use a thick PVC film. Before you decide how to glue the laminate to the concrete, the film is laid in strips. Each strip should spawn on the next strip with an overlap of 10 cm. The joints of the waterproofing should be glued with a wide tape.
If funds allow, it is advisable to use special cork or bitumen-cellulose substrates with cork filler. The advantage of such a substrate is low thermal conductivity and noise absorption. As a result, the floor will be less cold and the laminate floor will not be very ringing.
As an adhesive for the substrate, you can use the compositions specified by the manufacturer or universal tools such as, for example, Bustilat glue or “Liquid nails”.
- Before correctly laying the laminate on a concrete floor, the panels need to be brought into the room in which their installation will be carried out, and stand for acclimatization for 1-2 days.
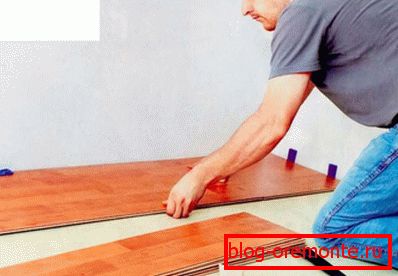
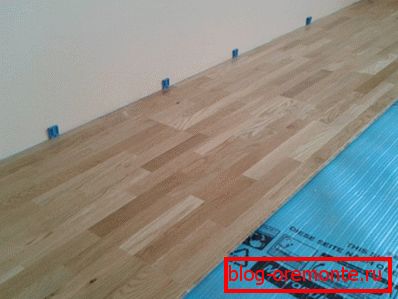
- When we start laying, we retreat a 1 cm wide gap from the walls. The compensation gap is necessary so that the floor does not swell with temperature changes. To maintain a uniform gap, you can use liners, cut from one board. At the end of the installation work, the gap can be closed with a plinth.
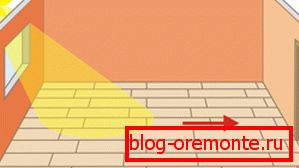
- Laying the first row starting from the wall, along which the light passes from the window. The slats are located on the long side of the wall with a spike. In the end, it should turn out so that the laminate was located a long side in the direction of the street light.
- Having laid the first row of slats, put the second row with some offset. Thus, we get a bunch of slats, which will provide the greatest strength of the finished coating. The offset of the slats relative to the previous rows can be ordered or chaotic.
Conclusion
Now you know how to make a laminate flooring on a concrete base with your own hands. If you have any questions, you can get an answer to them by watching the video in this article.