How to independently make a high-quality and beautiful pool
Have your own pool, you see, it is very nice and convenient. But first, of course, it needs to be done. And here you can confidently say that it can be turned on its own, without hiring an outside brigade. In this article we will talk about how to make a cool concrete pool with your own hands so that you can invest a little money and get a great result.
But first, a few words about whether it is worth making such a structure out of concrete.
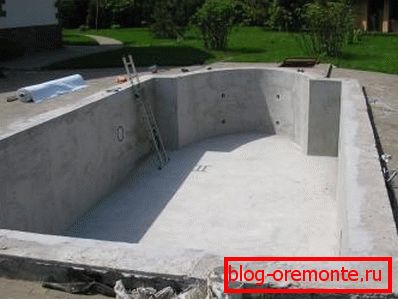
Features of a concrete pool
In fact, the easiest thing to ask here is to ask another question: if from concrete, then from what? After all, in fact, there are no worthy analogues to this material.
Of course, there are various plastic pools and flexible rubber bowls, which can be given any shape, but can they really be called very strong and durable? Yes, probably, as a decorative pool or tank for bathing children, they will do, but where intensive use of the structure is supposed to be better to use concrete.

Moreover, the price of the mixture and all related materials is quite acceptable.
For the manufacture of a standard pool will need such consumables:
- Ingredients for the preparation of concrete: crushed stone, sand and cement.
- Armature for the assembly of the frame.
- Plastic pipes for water supply and drainage.
- Galvanized steel and formwork boards.
- Ruberoid on a film basis.
- Waterproof cement based mix.
- Finishing finishing material. This may be, for example, sandstone or ordinary tile.

Of course, the project of a bowl of a pool made of concrete is still not the cheapest pleasure, but this is not cosmic money either. Especially if you do everything yourself.
Now let's touch on another topic.
Options for the manufacture and finishing of the pool
As a matter of fact, it is possible to cast a container of any shape from concrete, but since it is better to consider the simplest option as a good example, we will only talk about round and rectangular basins.
In fact, the instructions for both designs are about the same, and the only difference is that the round shape will have to be prepared a little longer. Mainly due to the fact, it is necessary to position the reinforcement in a special way, to bend the formwork sheets in order to get the most even line of the circle. In addition, the device pool bowl of concrete round shape implies a greater consumption of tile glue.
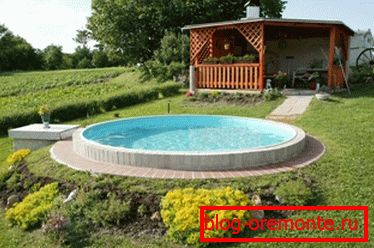
In the step-by-step instructions, we will analyze both options.
As for the finishing, then the choice depends only on your wallet, taste and preferences. Tile, sandstone, mosaic tile or even just paint the surface - as you can see, there is something to choose from.
Please note that sometimes a pool of concrete rings can be made, that is, as if from ready-made concrete products - and there are nuances. It turns out that the use of ready-made forms on the one hand is very convenient, but on the other - this is a risk. The catch is that you never know how high-quality a product you will get, whether it will start to crack and how long such a ring will serve without any problems. So self-pouring may be troublesome, but in the final quality you become more confident.
So, with the nuances of the base material, we figured out, now we can proceed to review directly the technology of making a pool of concrete.
Step by step scheme of work
To perform the work you will need a set of the most common construction tools:
- Tanks for making concrete and shovels.
- Puncher and grinder, screwdriver.
- Roulette, thread, various screws and dowels.
- Shear rule with level.
- Thrombosis device.
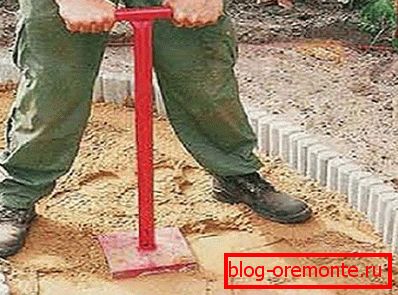
- Spatula for applying a waterproofing layer.
- Brushes for applying mastic at the points of connection of roofing felt strips or industrial hairdryer for soldering seams.
- Wrenches and soldering iron for assembling the water supply system and descent.
As you can see, the basic set is quite standard - there is nothing super-expensive in the list.
Tip: you can save and not buy power tools. Just rent it on the days you need it.
In general, if all of the above is, then you can safely get to work.
Let's start.
Digging of the pit, pouring of the rough base and primary waterproofing
So, we have to do the markup.
The rectangular pool is simply laid out - the corners of the future structure are determined, pegs are driven in at these points and a thread is pulled between them.
Round shape is somewhat more difficult. To do this, we determine the center of the future circle, drive a peg at this point. After that, we calculate the length of the radius, we tie a string to the peg, on the other side of which a stick is attached.
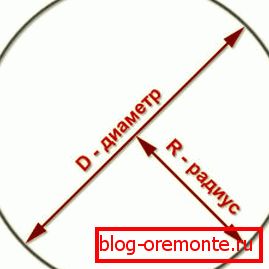
And then we act according to the principle of working with compasses - we take a stick in our hands, stretch the thread and go around the axis. At the same time, we draw a circle on the surface of the earth with a stick.
Advice: if a circle cannot be drawn because of the peculiarities of the surface (for example, this happens in the case of thick grass cover), then you can spill dry paint or any colored powder along the line where the stick passes.
Now we begin in practice the device of a bowl of the pool from concrete. That is, dig a pit of the desired depth and maximize its bottom.
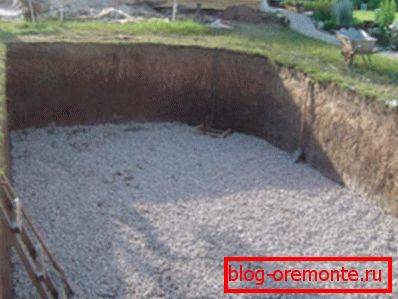
Then we level the bottom plane with the help of backfilling and subsequent tamping of a layer of sand - the result should be a fairly flat surface. We lay a film on it and pour a thin screed (5-10 centimeters thick) of concrete on the basis of crushed stone on top of it. The reinforcement cage is not needed at this stage, since in essence it is just the creation of a roughing plane for the primary waterproofing layer.
When the screed is dry, roll out the strip of roofing material along the bottom of the excavation so that they cover the entire height of the sides of the circle. At the same time try to do everything as carefully as possible, so as not to tear the material - after all, the normal operation of the pool ultimately depends on the quality of the entire waterproofing.
Overlapping strips of ruberoid should be at least 10-15 cm. In addition, strips must be stapled together. This can be done with a thick bitumen mastic (just apply it with a brush in the right places and then stick the strips to each other, as it were), or with the help of spikes of the edges with an industrial hairdryer.

And the most important thing! Do not forget to plan in advance at what points the fittings for water descent will be located. If you have already poured the solution, and it dried, and only then remembered the pipe system, then it does not matter. Diamond drilling of holes in concrete will help here - any diameter in the structure of the stone is drilled in a matter of minutes.
So, suppose that the pipes are laid, the hole for water descent is mounted and the pit with roofing material is ready. We proceed to the next stage.
Assembling the frame of reinforcement and installation of formwork
The order of work should be something like this:
- Laying the water supply pipe. The edge of the pipe, in principle, can be removed at any point - at least in the side of the future pool, at least in the bottom.
- We take reinforcement rods and make a grid along the bottom in a rectangular trench (with a cell size of about 50 by 50 cm.) If the reinforcement frame is not laid, the concrete may crack, and this, as you understand, is fraught with waterproofing failure. As for the round pit, the reinforcement in it can be laid like a fan, and then all the lines can be connected with each other by circular rods.

- Now you need to cut and bend pieces of reinforcement in such a way that one half of the rod lay at the bottom of the pit and grappled with the main horizontal grid, and the second seemed to board the pit vertically. Similarly, you need to go through the whole circle.
Note! When working with fittings, be especially careful not to break the waterproofing of the concrete pool bowl. That is, simply speaking, so that the metal is not broken ruberoid.
If the frame is assembled, the formwork can be mounted.
In fact, you just need to install vertical bumpers along the entire line of the pool at a distance of about 30-40 centimeters from the plane of the edges of the pit.
In a rectangular trench, you can simply install the spans with boards that are covered with film from the inside.
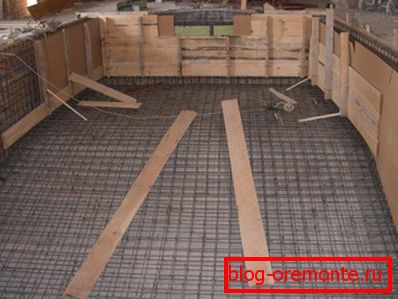
But in a round pit will have to tinker with galvanized, before you pour the bulk of the concrete. Here, the bottom surface is attached (vertically, of course) with dowels, columns of not very thick timber (the distance between them should be no more than 15-20 cm. So that the circumference of the circle is not distorted). And flexible galvanized iron strips are screwed to these posts with screws.
This is how the frame is going along the bottom of the pit and the side formwork is installed.
Now go to the last stage.
Pouring concrete and finishing waterproofing
This is the easiest job.
- We install horizontal beacon guides along the bottom of the pit.
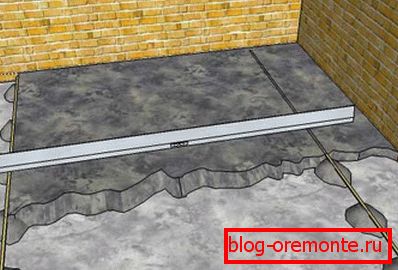
- Prepare the concrete mix and, in fact, make the usual tie at the bottom of the pit.
- Then we pour concrete along the contour of the pool. - that is, pour the mixture into the space between the vertical formwork and the outer edges of the pool.
- We wait until everything hardens, and then we remove the formwork.
- Waterproofing the entire concrete plane of the sides and bottom with a waterproof mixture.
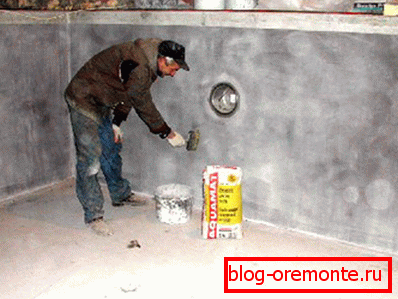
After that, it will only be necessary to trim the pool with some kind of tile or paint it.
Advice: if during the pouring the formwork “pushes” in any place and the wall of the bowl is deformed as a result, then do not worry - everything can be leveled. Even if you notice a defect late, and the mixture is completely frozen, then, as a last resort, cutting the reinforced concrete with diamond circles will help - the technology can easily cope with excess protrusions.
That's all. Let's summarize.
Conclusion
We have substantively figured out how to make a basin of the pool of concrete so that everything turned out beautifully and securely. In addition, we considered and options for the decor of this design. We hope that the review will be useful in practice. (See also the article Protecting concrete from moisture: features.)
If there is a desire to learn even more, then we recommend watching the additional video in this article - an interesting movie!