How to concrete pillar: preparation for installation and
Concrete pillars are one of the most reliable ways to strengthen vertical supports. Most often, it is produced with an independent production of hedges, however, it may also be necessary for mounting structures on vertical bearing elements: country balconies, elevated terraces, walkways, etc.
In our article we will describe in detail the method of installation of supports with their subsequent fixing in the ground. We will try to pay special attention to those nuances that have a direct impact on the durability of the structure.

Preparation for installation
Before installing the pillars and fixing them with cement mortar, it is necessary to prepare the nests and the parts themselves.
The instruction will be as follows:
- At first we apply marking on the terrain. The most convenient way to do this is to use a laser range finder, but if necessary, you can cope with a tape measure, and even a cord with knots imposed through every meter - it all depends on the required accuracy.
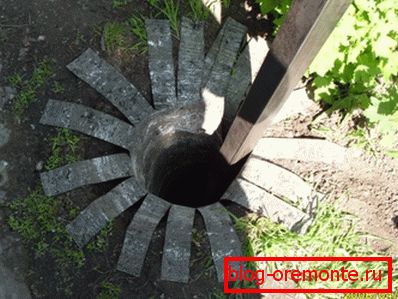
- In the marked points we begin to dig holes. It is better to do this with the help of a shovel, removing the soil from the depths of the scum - a special device from a piece of steel pipe.
- However, this method is rather time-consuming, because most often the holes for the supports do not dig, but are drilled. Work is carried out either with the help of a manual drill, or with the help of an electric ground drill.

Note! Small holes of fixed diameter for thin columns can be made using old fishing ice screws of auger construction. Of course, the blades will have to be changed after that, but if you do not overdo it, the tool will not suffer.
- We select the depth of the hole in such a way that the pillar is securely fixed. As for the diameter, it should be about 70-100 mm larger than the diameter of the support itself - so it will be much more convenient to lay the solution in the resulting gap.
- If there is a need, then around the perimeter of the hole we assemble the formwork of the boards.
Also, do not forget about the protection of part of the structure, which will be underground, from corrosion and rotting:
- We impregnate wooden poles with used engine oil and also process it with antiseptics. In some cases it is advisable to wrap the lower part of the support with roofing felt.
- Metal products are coated with anti-corrosion paint, which will prevent the formation and spread of rust. Of course, the price of the qualitative composition will be considerable, but then we will save on the replacement of supports in the future.
Method of termination
Partial concreting
By mounting it yourself, fixing with cement mortar can be performed partially or completely.
In the first case, we act like this:
- Support set exactly in the center of the hole.
- Align the product vertically and drive it into the bottom of the pit so that the lower end is about 40-50 cm deep.

- In the lower part of the nest we fall asleep coarse gravel, which is then compacted.
- Preparing the solution: for 1 part of cement M400 we take 3 parts of sand and 5-6 parts of gravel. The material must be sufficiently fluid to easily fit into the space between the walls of the pit and the pillar.

- Fill the structure until the liquid concrete stops seeping into the gravel.
This technique is applied when the column is not affected by heavy loads. Of course, the reliability of installation will be relatively low, but the amount of investment in the work can be reduced, and very significantly.
Full concreting
Much more reliable construction is obtained when the column is fully concreted.
However, the labor costs here will be significantly higher:
- At the bottom of the hole for the support, pour the gravel-sand mixture with a layer of about 15-20 cm. Use the cushion to rub out the pillow, gradually sprinkling the material and moistening the sand to increase the density.
Note! The thickness of the bedding should be considered when drilling the nest for installing the pores.
- In the hole set the post, align it vertically and fix braces or wooden struts.

- Prepare the solution using the same proportions as in the previous version.
- We fill the hole with layers of 20-25 cm. Each layer of concrete is whipped with a steel rod, compacting the material and removing excess air from it.
- Fill the nest with concrete to the desired level, then carefully smooth the surface around the support.

Note! To increase the strength, several large stones or fragments of thick reinforcement can be laid in the lower layers of the solution. It doesn't hurt!
Final operations

In order for the installed support to stand for a long time, it needs to ensure proper care immediately after pouring the mortar:
- To avoid cement drying out and its incomplete hydration, we close the base of the column with polyethylene.
- Every three to four days we check the condition of the surface. If dust or small cracks appear, we additionally moisten the cement.
- We carry out the stripping after three to four weeks, but poles can also be used for mounting non-heavy elements of the fence after 10 days.
Note! It is possible to use this technology only at positive air and soil temperatures. Already at +50From and below, the concrete sets and hardens very slowly, so that the process of curing will proceed according to an unpredictable scenario.

After complete polymerisation of the cement, we remove the braces and wooden struts, and then proceed to other planned works: put concrete heads on the poles, fasten the fence sections, install support beams to assemble the terrace, etc.
Conclusion
Concreting metal pillars, wooden support beams, as well as reinforced concrete piles when installed in the ground makes it possible to reliably fix these structural elements. The use of cement mortar with macadam filler, of course, increases the cost of this event, but the reliability of the installation will be much higher than when driving a support into the soil or blocking the hole with soil with the addition of sand and gravel.
Despite the simplicity of the technique, before starting work, we recommend still watching the video in this article in order to understand the sequence of basic operations.