How is the heating of the concrete welding machine
В общих чертах схема прогрева бетона сварочным аппаратом остаётся точно такой же, как и понижающим трансформатором - разница заключается в том, что в данном случае мощность агрегата будет меньше. Такой метод приемлем для небольших объектов и в домашних условиях чуть ли не идеален, учитывая то, что вам не придётся искать дополнительные мощности. Для примера мы используем аппарат на 250А при заливке небольшой плиты 4×5м, а в качестве дополнительного материала мы вам покажем видео в этой статье по данной теме.
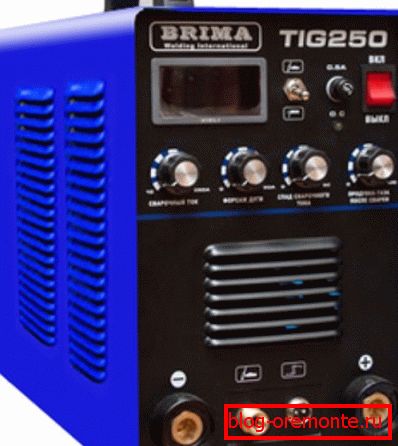
Concrete heating
Note. According to SNiP 13.03.01-87 on supporting structures, if the average daily temperature outside falls below 5? C, electric heating of the concrete should be carried out. This is used to prevent the formation of an ice film in the fresh solution around the reinforcement.
At home, you can produce concrete heating welding transformer.
Use of a heating loop
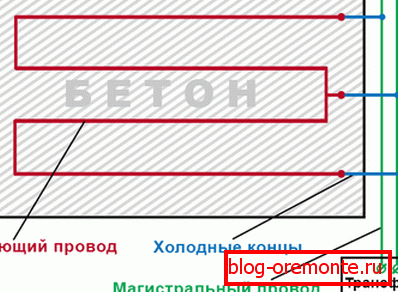
Note. In addition to loops, the heating of fresh concrete structures can be carried out by an electrode method, in heating formwork, by liquid installations, by the method of induction and by infrared radiation.
If the mortar freezes in the temperature mode (the mixture overfreezes), then the strength decreases sharply and the surface turns crumbling - this is immediately visible when the reinforced concrete is cut with diamond circles or diamond drilling of holes in the concrete.
Обогрев ЖБ конструкций греющими петлями по принципу подачи предельного тока на кабель нужен в основном для площадок (плитных фундаментов) перекрытий и реже для стен, когда не отапливается само помещение. Такие схемы, как правило, запитываются через понижающие трансформаторы, на которых есть регулировка напряжения - это позволяет поддерживать необходимую тепловую мощность в зависимости от изменения температуры воздуха на улице. Данный метод является более экономным, нежели электродный (см.также статью «Штроборез для газобетона: конструкционные особенности и применение»).
What we need
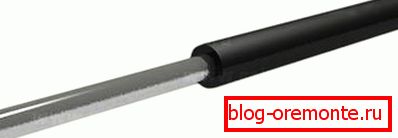
- So, as we have said, we need a transformer, which means that at home we will use the power of the welding machine for these purposes - in our case, up to 250A, although it can be more, but we will specifically consider the minimum in order to learn the maximum benefit. In addition, as required by the instructions, we will need a PNSV wire - in this situation we will cut pieces of 18m each.
- We also need aluminum single wire with a cross section of 2.5-4 mm2 (APV is suitable), cotton insulation tape and pliers, current tongs. And, of course, such work can be performed only on those areas where there is a 220V power source - this may be a power line, but also (this happens at the beginning of construction) you can use a carburetor or diesel (more economical) generator.
| Core diameter in mm | 1,2 | 2,0 | 3,0 |
| Ohm / meter | 0,15 | 0,05 | 0,02 |
PNSV resistance depending on cable thickness
Getting Started
We have a welding machine for 250A, now we need PNSV, the amount of which we calculate, based on the formula R = U / I, and if we know that U = 220V, I = 250A, then R = U / I = 220/250 = 0.88th.
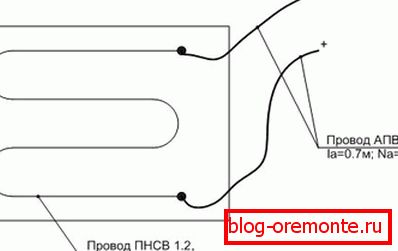
Что же из этого следует - если мы имеем на выходе максимально 250А, то для того чтобы не перегружать аппарат сделаем своими руками 8 петель по 25А каждая - этого будет вполне достаточно. Для этого возьмём кусок ПНСВ длиной 18м и диаметром 3,0 мм (0,05 см/метр) - для плиты 4×5м этого будет достаточно.
Зачищаете концы ПНСВ по 40-50 мм и к каждому из них подсоединяете алюминиевый провод (можно, конечно, использовать и медь, но цена алюминия гораздо ниже) - позаботьтесь о том, чтобы скрутка получилась плотной - от этого будет зависеть корректность работы нашей конструкции. Длина алюминиевого провода будет зависеть от того, на каком расстоянии вы сможете установить сварочный аппарат - целесообразнее будет поднести его как можно ближе. Если эти концы получились короткими - не расстраивайтесь - их можно нарастить в любой момент на необходимую длину, только скрутку изолируйте тщательно (см.также статью «Пигменты для бетона: основные характеристики, сфера применения и методы самостоятельного приготовления»).
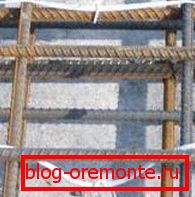
Now we need to lay the PNSV, distributing it evenly over the entire area so that the twist with aluminum will be inside the poured slab, but in no case will it touch the metal frame! Best of all, if you manage to thread the PNSV between two crates - inside the frame - so the cable will be inside just in the middle of the plate, like butter in a sandwich between two pieces of bread of the same thickness.
When pouring mortar, you can easily move the wire, so it should be tied to the fixture with pieces of insulated aluminum, but be careful not to damage the insulation on the PNSV - so heating the concrete with a welding machine will be effective and safe.
It is also possible to cut the PNSV into pieces in one loop and pull aluminum ends from each so it will be much easier to pass the wire between the reinforcement bars in the frame, only here you need to be careful not to confuse the ends. It is best to mark them with a marker for isolation (put the + and - signs).
To connect the welding machine, you can use cables - ground and the one that goes to the holder, or screw the aluminum wire directly to the terminals. Try to connect the circuit as soon as possible after pouring and turn on the voltage regulator to minimum, turn on the switch and check the voltage.
Initially, a jump to 240-250A is possible, but as the mass warms up and solidifies, it will fall, and you will be able to gradually increase it as needed.
Conclusion
Так как греть бетон сварочным аппаратом нужно постепенно, то проверяйте напряжение каждые 2 часа, постепенно его увеличивая (читайте также статью «Подбетонка: что это такое и как она делается правильно»).
In about 8 hours you will reach the maximum and the stove should dry within 3 days (but this is not the degree of operation).