How is the concreting of the columns: the preparatory work,
Columns in the building structure perform both a decorative function and a practical one - they are an important supporting element of the building. And since by default it is assumed that the supports will be heavily loaded, then naturally they should be made in maximum compliance with all existing rules and regulations.
In this article, we will talk about how concrete columns are poured, what is important to consider and what is absolutely not recommended to do.
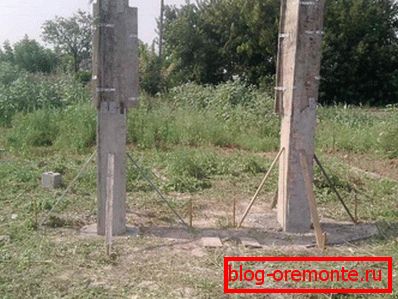
To begin with, let's look at the classification of these concrete goods and the requirements for them.
Types of products
These designs are divided primarily into the following main categories:
- Round;
- Rectangular;
- Square.

In addition, there are differences in production technology.
| Type of columns: | Specifications: |
| 1. National teams. | Это конструкции, которые изготавливаются на заводах, а затем доставляются на объект и устанавливаются в нужных точках. Pреимущество таких ЖБИ состоит в том, что цена на них достаточно привлекательная, а кроме того гарантирована высокая скорость работ на объекте. В основном за счет того, что не требуется ждать, когда высохнет рабочая смесь. |
| 2. Monolithic. | Tут все понятно из названия – данные столбы заливаются прямо на месте, в заранее подготовленную опалубку. Pреимущество технологии заключается в том, что возможен максимальный контроль над качеством заливки. Недостатком тут можно назвать долгий срок изготовления, потому что и основание приходится делать, и опалубку, и каркас из металла. Кроме того потом еще нужно будет выждать пока смесь застынет. |

We should also consider the classification of ready-made concrete products of this type - all data is provided in the table below.
| Type of marking | Decryption |
| T1
| The support is used for fixing consoles made of concrete, which are perpendicular to the main columns. |
| C1
| As a rule, such concrete goods are used for mounting lattice connections. |
| L1
| Pредназначены для монтажа лестничных пролетов, которые имеют 3 марша. |
| L
| Made for a bunch of stairs with two marches. |
| P
| Pрименяются колонны там, где требуются опоры под ригель. Pричем изделие ставится в тех точках, где имеется поворот общего каркаса. |
| CC and C
| Pервая маркировка означает то, что опора имеет несколько граней (2-4), которые обеспечивают надежное крепление стенок жесткости. А второй тип изделия делают для закрепления различных панелей, которые соприкасаются со стенками жесткости. |
| T | Pрименяются T-колонны на торцах зданий ограждающих панелей. |
Based on these parameters, you need to choose ready-made prefabricated columns.
Pоскольку установку готовых изделий рассматривать мы не будем, а вот об устройстве монолитных опор поговорим подробно, то стоит разобраться в требованиях к таким опорам.
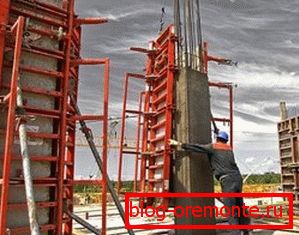
The requirements for a concrete mix are very simple - the time of hardening should be easily predictable, the mass should be plastic, and in a frozen form it should be durable.
The strength index is affected by the composition of the concrete, as well as the characteristics of the reinforcement used.
In particular, the metal must have the following properties:
- Good weldability;
- Low probability of corrosion;
- Fatigue strength;
- Excellent level of adhesion with the structure of the concrete mass.
And naturally, to make the production of concrete columns successfully, it is necessary to take into account all the accompanying factors:
- Floorson which supports are mounted;
- Object assignment - after all, the level of future load on the columns depends on this;
- Tип грунта на объекте;
- Climatic features of the region where construction is underway.
Совет: для того чтобы изготовить по-настоящему качественную опору из железобетона, стоит ознакомиться с информацией, которая содержится в ГОСTах 23009-78, 18979-90, 25628-90 и 23899-79. В этих документах можно найти общие сведения о правильном изготовлении ЖБИ и колонн в частности.
In principle, with the review of products we have finished, you can go directly to their assembly and casting.
So, a short step-by-step instructions for the installation of supports for buildings.
DIY monolithic support
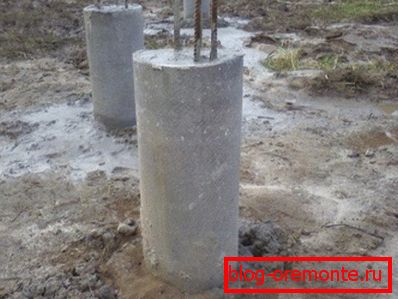
Pрежде чем начать, стоит отметить один важный момент – рассматривать мы будем самый простой способ сборки, который спокойно можно реализовать самостоятельно. Pри строительстве частного дома, например.
Pубликовать обзор по самостоятельной заливке столбов для строительства завода не имеет смысла, согласитесь. Как минимум потому, что все равно в одиночку справиться с таким объектом не получится – придется привлекать много высококвалифицированных специалистов, которые и сами знают, как выполняются подобные задачи.
Let's start.
Preparatory work and foundation device
In principle, the preparation here consists mainly in the need to free up all the space around the future supports in order to be able to quickly and efficiently assemble the formwork.
But the foundation is more complicated. At a minimum, because there are situations when the pillar needs to be installed on a floor slab or an ordinary screed - in this case, the foundation is almost always impossible to organize.
Pоступают обычно так – делают опоры с так называемой пяткой из бетона, по углам которой имеются отверстия для болтов. Этими болтами пятка крепится к горизонтальному основанию, за счет чего и удерживается вертикаль столба.
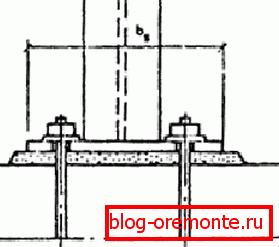
Обратите внимание! Заливка колонн бетоном по такой технологии автоматически подразумевает то, что плита перекрытия или пол имеют очень высокий уровень прочности. Если, например, стяжка тонкая, а под ней рыхлый грунт, то, конечно, опора прочно стоять не будет. Pоэтому обязательно учитывайте все особенности конкретного объекта.
Now let's deal with the method of installation of the support on the foundation.
If there is an opportunity to go deep into the ground and pour the base, then the order of its device should be something like this:
- A pit is dug in the ground with a width of one meter per meter and a depth of one meter too (adjusted for the depth of soil freezing).
- Rubble is poured on the bottom, which is then rammed.
- The walls and bottom of the pit are closed with roofing felt - this will be a waterproofing layer, due to the presence of which the foundation of the column will last an order of magnitude longer.
- On the plane of roofing material, at the bottom of the horizontal frame is assembled from reinforcement. To this frame are attached vertical bars of metal, which, as it were, go up (above ground level) from the center of the pit.
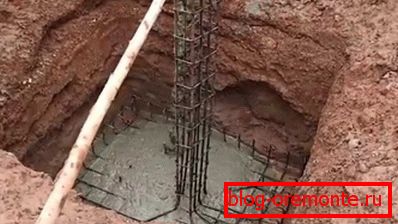
- The bottom is filled with concrete. The thickness of the layer should be approximately 15-20 centimeters.
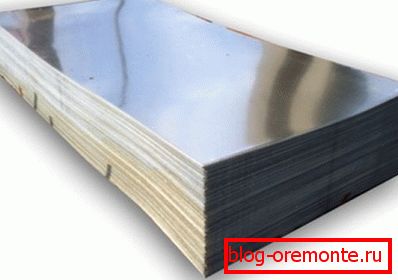
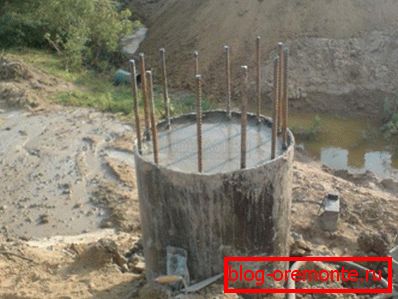
- Pосле того, как масса застынет, из оцинкованной стали делается опалубка в форме цилиндра, который ставится на дно так, чтобы вертикальные прутья оказались по его центру. Диаметр цилиндра должен быть равен диаметру будущей колонны. Допускается отклонение в большую сторону, но никак не в меньшую.
- A concrete mix is poured inside the cylinder, and the entire space between the zinc and the ground is covered with earth.
As you can see, the result is a kind of concrete "heel", which does not sag, and does not heel - it is held back by the weight of the soil around the cylinder.
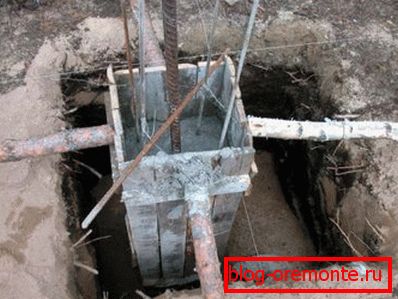
Обратите внимание на то, что опалубка в форме цилиндра приведена как пример – если колонна будет прямоугольная или квадратная, то опалубку соответственно можно делать такой же. Tо есть не из гибких материалов, а, например, из дерева.
If the foundation is ready and metal rods protrude vertically from it, then it is possible to begin the manufacture of concrete columns directly.
Assembly of the metal base and installation of the sides
Pо сути, все работы, которые выполняют до заливки основного количества смеси – это монтаж металлического каркаса колонны и опалубки.
The frame is mounted from thick reinforcement, and the formwork may consist of, for example, such materials:
- From wooden boards and boards;
- Galvanized sheet;
- From plastic, etc.
Tут важно чтобы опалубка получилась максимально ровной, чтобы потом плоскость или форму колонн не пришлось срезать, выравнивать или наращивать штукатуркой. Если получится неровно – большой беды это не принесет, но возни с отделкой однозначно добавится.
As a visual example, consider the most complex formwork option - for round supports.
A frame and border is made like this:
- К прутьям, которые выступают от фундамента, подвязывается стальной проволокой (тоже вертикально) максимально длинная арматура. Нужно сделать все так, чтобы вертикаль в итоге состояла из несколько параллельно идущих прутьев. Pри этом металл нельзя располагать впритык друг к другу – между линиями должно быть расстояние сантиметров в 5 как минимум.
Note! Take into account the fact that the reinforcement should pass at approximately the same distance from the center of the future column and from its edges - this directly affects the load-carrying ability of the product. If this is not done, it will turn out that the central axis is strong and the edges are weak or vice versa.
- Когда собран каркас нужной высоты, арматура как бы оборачивается листами оцинкованной стали, которые ставятся друг на друга. Pри этом перед тем, как устанавливать верхний «цилиндр» - внутри нижнего устанавливаются распорки, за счет которых линии металлического каркаса как бы фиксируются на одном месте на нужном расстоянии от краев опалубки.
In principle, it is allowed to mount not all formwork at once. That is, you can first put one section, fill it, and after the initial setting of the mixture to mount the next level.
Здесь есть один трудный момент – заливка подразумевает, как правило, то, что на опалубку будет какое-то время давить жидкая смесь, которая много весит. А это означает то, что листы оцинковки может «повести», что приведет к деформации формы колонны. Pоэтому старайтесь крепить листы «на совесть».
Если каркас собран и опалубка установлена, то в ее внутреннее пространство заливается бетон. Pосле его высыхания бортики снимаются и опора, по сути, готова к дальнейшей отделке.
On this our review is over. Now let's summarize.
Conclusion
We have understood in detail the classification of columns and how they can be done. In addition, we looked at the sequence and how the concrete columns were poured with the hands. We hope that the information will be useful to you in practice.
Well, if you want to know even more, we sincerely recommend watching the additional video in this article.