Floor concreting: preliminary preparation, laying and
Concrete floors are a time-tested solution for most industrial and private premises. There is nothing stronger and more durable, the coating can withstand significant loads, temperature drops and mechanical stress. Many homeowners are planning to do concrete flooring with their own hands, in order not only to save money, but also to be confident in the quality of the result.

Actions before the pouring process
In order not to slow down the responsible process, you should stock up with everything necessary for work.
What will need to be prepared

Not only floor concreting technology is important, but also high-quality material with tools.
- Shovel.
- Lom.
- Large iron trough.
- Drake.
- Turtle.
- Level.
- Rule
- Beacons.
- Bars of different sizes.
After you have prepared everything you need, it's time to purchase or order the material.
You will need the following.
- Cement, sand, gravel.
- Plasticizers - additives to extend the life of the floor.
- The waterproofing and heat-insulating materials.
- Gypsum or alabaster.
- Iron fittings.
- Formwork boards (if one is planned).
Note! Attached to the bulk materials, the instruction strongly recommends storing the purchased cement, chalk and alabaster in a dry ventilated place. Moisture will cause the material to become unusable.
Preliminary preparation

In many cases, the concrete floor is mounted on top of a natural base, that is, on the ground. But working with an unprepared plane is impossible.
Therefore, before concreting the floor, it is necessary to carry out certain actions.
- If the building is new, all debris and excess items are removed.. In the old structure, the existing flooring and baseboards are being dismantled.
- Measure the distance from the former (or planned) baseboards to the base of the floor.. It should be at least 30 cm. If the figure is less, the top layer of soil is removed.
- The plane must be level with the horizon, even if we concrete the floor in the garage. Therefore, leveling of the base is carried out. The laser level is desirable, but the usual - bubble is suitable. It is recommended to put it on a long rule lying on the ground.
- A line should be drawn around the perimeter of the room, at a height of 10–12 cm from the base.. This will be the level of the first layer of rubble, pebbles or expanded clay.
- Next is the second line, 5 cm above the first. This is the second layer of sand.
- Followed by two more lines of 5 cm, on the layers of heat and waterproofing.
- Now draws the last straight line, 10 cm above the last but one. This layer will take concrete.
Flooring

Now, after the end of the preliminary work, you can bring materials and begin to install the surface.
Now we will take a closer look at how to properly concrete the floor in a house or garage.
- A layer of crushed stone for concrete is poured in and carefully leveled

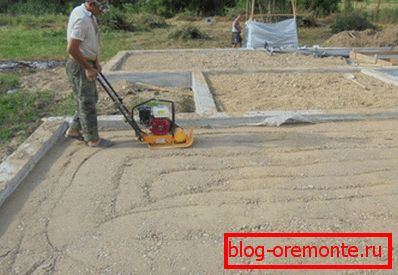
- On top of the first layer lay and tamp sand. It is better to do this with the help of a special device - vibrating plates. Since it is not at all, you can use a log with two handles, or a timber with a board attached below.
Hydro and thermal insulation
So that the moisture does not bring trouble, the floors must be finished in a special way.
- A rolled waterproofing material is lined onto a sandy substrate.
- Bitumen-based materials are well suited for protection. They have an affordable price and decent features.
- You can buy plastic wrap. Its thickness should be at least 200 microns.
Note! The material is spread overlapped. Joints do not hurt to pour resin, to prevent leaks. Next, you need a thermal insulation layer. Use only high quality, specially designed materials.
Formwork
Often, a large room can not fill in one day. In this case, resort to the method of division into sections (maps). Having determined what area you are concreting today, assemble in the borders of the formwork of boards or timber. The next day, the same is done with the next card.
Fitting installation

In most cases, the floors need to be strengthened.
This will prolong their service life and prevent damage from stress.
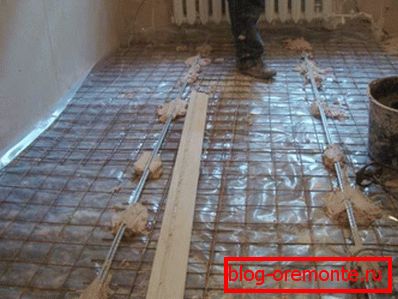
- If you are finishing a private house, it is permissible to use road reinforcement mesh class B, with a cell size of 100? 100 mm or 150? 150 mm. Rod thickness - 5 mm. This is enough to ensure a solid concrete base.
- For places with increased loads, it is worthwhile to mount a frame of thicker reinforcement.
- This design is assembled in place of rods with a diameter of 8-16 mm.
- Where falling heavy objects, equipment, equipment and other things are possible, fiber can be used. It will increase the viscosity of concrete, increase stretching when bending.
- It is undesirable to lay the reinforcement directly on the substrate. It is recommended to make a gap of 2-3 cm.
Installation of beacons

Before directly pouring will have to install beacons.
This is much easier work, the floors will turn out perfectly smooth.
- Mayachny levels establish, being guided by a level or level. Their upper part should correspond to the future level of the floor plane.
- The distance between the beacons is from one to four meters.
- The timber is fastened with wooden pegs hammered into the base (only if there is no waterproofing, and only gravel and sand are present).
- A good option is to fix the beacons with gypsum or alabaster.
Flooring

If you have planned passing works, for example, cutting reinforced concrete with diamond circles, you should agree in advance on the terms with the masters. The fact is that particles of building debris flying in different directions can stick to the still damp surface.
Therefore, after pouring, no action should be taken until it is completely dry.
- In a large container (preferably iron trough) mix all the components. The proportions are as follows: 1 part cement (optimum grade M-400) + 2 parts sand + 2 parts gravel.
- Everything is gently mixed, then poured into the composition? pieces of water and knead again. Well, if there is a concrete mixer, but you can do with a strong shovel.
- It does not hurt to add a plasticizer to the mixture. Follow the instructions on the packaging of the product.
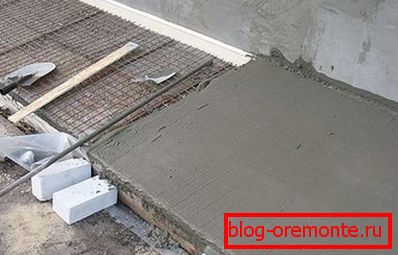
- Floor poured, starting with the most remote areas. It is convenient to fill the gaps between the lighthouses through one.
- After the lighthouses are removed, they fill in the places of their former location.

- It is recommended to make the mixture compaction with a vibrating rail This is a steel channel with an electric motor. It is pulled along guides before they are dismantled.
Note! During work breaks, it is not allowed to leave the vibrating rail on the edge of the laid cement layer. This leads to stratification and creep of the solution. To prevent marriage on the edge of the temporarily set the board. Along it pour the last portion of the mixture.
Subsequent finishing of the floor

Flooded and frozen plane is not considered fully finished. Further, not only diamond drilling of holes in concrete is carried out, but also final grinding of surfaces.
Actions are especially important before the installation of self-leveling floors, laying laminate, linoleum.
- Often used to finish the fill. Fully frozen within 2-3 days, the surface is covered with a thin layer (up to 1 cm) of the solution. Mix 1 part of cement and 2 parts of sand. Diluted with water to a semi-liquid state and poured onto the floors. A neatly leveled surface is left until ready for a week.
- Often the work ends with grinding "helicopter" - disk-blade machine. The operation is carried out only on the finished surface.
Conclusion
To concreting the floor in a private house was of high quality, it should strictly adhere to the technology of its preparation and pouring the solution. Equally important is the quality of materials and the correct proportions.
Step-by-step action describes the video in this article.