Construction of a house of aerated concrete: features of the
The appearance of artificial materials for the construction of houses was not immediately approved by consumers. Only in recent years, the demand for cellular concrete has become significant, as energy prices and natural materials have crawled up. In this article we will look at how to properly fold the house of aerated concrete blocks with your own hands.
Preliminary stage
When choosing aerated concrete, it should be understood that it will definitely need to be protected from weathering. In addition, the material has a very high coefficient of vapor conductivity, so it is prohibited to use ordinary paints, putty and plaster in this case.
Otherwise, the moisture from the room will begin to accumulate in the walls, which will cause their destruction. If we talk about the cost of building a house of aerated concrete, it is no different from wooden, brick, only slightly more expensive than frame.
Now let's consider as early as possible the preliminary stages of building a house of aerated concrete.
| Site preparation | After the estimate for the work has been signed, the documentation has been compiled and the place has been allocated, it is necessary to plan the site. This includes:
|
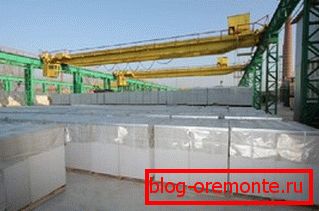
| Delivery and storage of material | It is cheaper and easier to buy aerated concrete, taking into account transportation to the construction site. But, there are cases when the material has to be removed by itself, for example, difficulties with access or remoteness of the site. Since aerated concrete is packaged in production in an airtight, durable shrink film that protects the material from moisture, you should not worry about possible atmospheric effects. The main task is to protect it from mechanical damage. |

Tip: Pallets should be firmly secured with soft lines to protect the load from movement and collisions. They should also be unloaded on soft lines.
Remember, aerated concrete has the ability to strongly absorb moisture, so keep it in a closed warehouse or under a waterproofing canopy on a flat compacted area. The instruction allows installing stacks in no more than 2 tiers.
Foundation
Immediately let's debunk the myths and delusions:
- Aerated concrete blocks have a small weight, so you can save on the ground.
- The building of such material can be installed only on the basement concrete floor, because of which the cost of construction increases.
It should be said one thing, a good foundation is called one that is able to provide a permanent form of the structure, regardless of the material of the latter. We can agree that the blocks will not put much pressure on the ground, so this will not be decisive when choosing a base.
Tip: if you decide to save money, it can cause cracks on the walls.
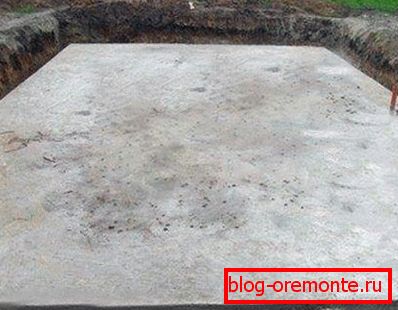
You should not also consider the foundation of aerated concrete, it should be built from the "solid" material. The best option for cellular concrete at the moment is considered to be a plate made of reinforced concrete, which can ensure uniformity and minimum level of shrinkage deformations.
Also, the basis for such houses can be a solid monolithic foundation, mounted on a sand cushion or columnar, with a monolithic belt made of reinforced concrete.
Tip: if you decide not to build the foundation yourself, before ordering the foundation work, find out how much installation costs in different companies to choose the best option.

Walling
Continuing step by step guide, let's do the walls. Aerated concrete is a light material, so it does not squeeze the adhesive composition from under the block. It can be laid without interruptions, which is impossible with traditional brick walls.
Building codes recommend the following block thickness:
- external walls - 375-400 mm;
- interior - from 250 mm;
- partitions - from 100 mm.
Calculate in this case the amount of material is quite simple - you should multiply the height of the wall by the width and divide by the block size in length.
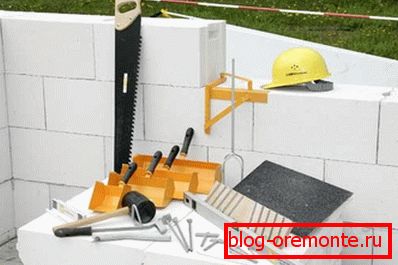
Tip: speed up and simplify the process of laying (processing) concrete blocks a special tool to work with them.

First row
- Prepare the base, removing all debris from it.
- Perform horizontal shut-off waterproofing.
Use:
- ruberoid
- bitumen or polymer roll material;
- cement mortar with polymer additives made from dry mixes.
- Apply the cement-sand mixture (1 to 3) with a comb or using a trowel on the waterproofing layer to level the surface.
- Level, evaluate the evenness of the base.
Pay particular attention to laying the first row, as this will affect the future work and the quality of the entire building. Control the flatness of the masonry with cord and level. Align the blocks of the first row horizontally using a rubber mallet.
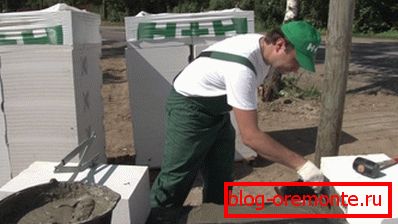
Tip: often in the first row there is a gap that is less than the length of the whole concrete block, so you should make an additional block.
To do this, use a special hacksaw, hand saw or electric saw. Then level off the sawn surface using a plane or a scraper for aerated concrete. Make sure that the end parts of the finishing block are completely greased with glue during installation.
Laying on glue
- In work, use the glue required consistency.. Its optimum density should resemble sour cream.
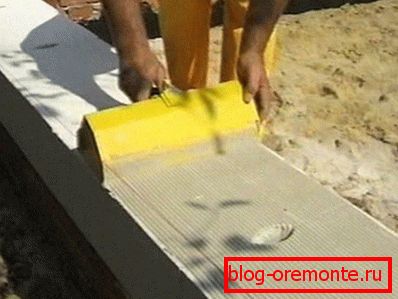
- Apply the composition with a trowel, carriage (the width of the tool should correspond to the width) or a special bucket, which has a curved edge.
- Smooth glue after applying with a spatula.
Upon completion of laying the first row, level the surface of the masonry with a plane for aerated concrete. Brush off small fragments and dust with a brush.
Tip: check the alignment of the masonry constantly, otherwise you can create local high voltage pockets in the wall due to overshoots, where cracks can then occur.
The whole process must be carried out in compliance with the technology and the specified parameters. Remember that when the glue mortar hardens, the aerated concrete wall cannot simply be disassembled, it can only be broken.
The continuation of the laying
Start the next row from one of the corners.
Experts recommend to ensure the evenness of the series to install:
- corner or wooden slats;
- if the length of the wall is significant - lighthouse intermediate aerated concrete blocks.
Lay the rows with the bandaging of blocks, shifting the subsequent rows relative to the previous ones by at least 80 mm. Do not rub the glue that passes from the seams, but remove it with a trowel.

Tip: can be used for making ordinary hacksaw with carbide nozzles.
Remember, aerated concrete blocks should not be exposed to precipitation, so they should be removed as needed. Laying is also desirable to protect the released film from the pallet.
Reinforcement
The structure of aerated concrete blocks is subjected to almost constant deforming loads, this also applies to any other buildings.
Affects this process:
- soil;
- non-uniform shrinkage;
- temperature;
- wind effects.
This can lead to the appearance of small cracks on the walls, which do not affect the bearing capacity, but worsen their appearance. It is recommended in this case to make reinforcement with metal rods.
They, in contrast to aerated concrete, which has a low resistance to bending deformations:
- perceive stretching, which inevitably occurs when the building is deformed;
- protect walls from cracking;
- provide protection of concrete blocks.
You must understand that reinforcement does not add to the laying of the bearing capacity. Proper design and construction avoids cracking.

The masonry in this case is reinforced or divided into sections by expansion joints. Also in the form of additional protection of the material from cracks, sometimes reinforcement of the finishing layers is used with the help of glass fiber mesh to prevent cracks from reaching the front.
In drawing up the project of reinforcement of aerated concrete take into account:
- General requirements;
- construction features;
- conditions of operation of the building.
For example, you should fix a long wall that will feel constant wind loads on itself.
Lay the reinforcement in a specially created armored belt, because inter-row reinforcement is not used in such constructions. This is due to the violation of the thickness of the seams and the difficulty in laying the next rows.
One can call only one exception to the rule when stainless steel branded fittings of small cross section are used.
Should be strengthened:
- the first row of blocks, which lies directly on the foundation;
- every fourth;
- jumper support zones;
- under window openings;
- elements under increased load.
Tip: in places of jumpers and under window openings, reinforcement should be 900 mm longer than the edge of the opening in each direction.

Remember that the reinforced ring beam must be laid under the ceiling and truss system.
For installation of reinforcement in the upper part of the blocks should be:
- Cut the grooves with a manual or electric wall chaser.
- Remove dust from strobe and fill them with adhesive solution.
- Insert reinforcement into glue and remove excess mortar.
To reinforce the concrete wall with a thickness of up to 200 mm, it is sufficient to use one bar of O8 mm reinforcement. When exceeding 200 mm - use 2 such rods, while you should not reinforce the expansion joints.
Conclusion
В данном материале мы постарались показать поэтапное строительство, с указанием необходимых ключевых моментов, на которые следует обращать особое внимание. Вы должны были уяснить, что лучшим фундаментом специалисты считают железобетонную плиту, а раствором для укладки – клей (см.также статью «Срок службы бетона: продляем время эксплуатации бетонной конструкции»).
It was also told about the reinforcement, and the properties of the material to absorb moisture, which must be taken into account when finishing buildings. The video in this article will help you find additional information on this topic.