Concreting the basement: do the floors and stairs
In fact, the concrete floor on the ground in the basement is poured quite simply, but in this case there are several nuances that certainly need to be taken into account. It is easy to do and the stairs, but again there are moments.
In this article we will understand how this work is done, what is needed for this, what can be saved on and learn some secrets.
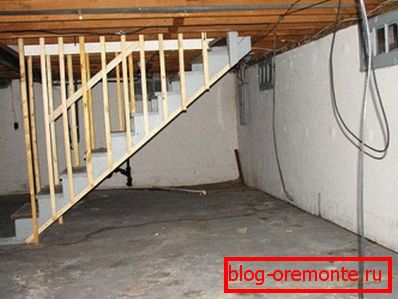
Let's start with the device of the floor - rather, we will determine what it can be made of.
Selection of materials for base casting
We will be determined with the composition of the working mixture for the preparation of concrete.
As a rule, use such components:
- water;
- sand;
- cement;
- crushed stone or expanded clay.
That's just the last point and is the most important. What is better to choose - gravel or expanded clay for concrete?

In order to answer this question you need to familiarize yourself with the characteristics of the materials.
| Crushed stone properties | Properties of claydite |
| High level of strength (important when it comes to standard granite stones). That is, the floors of this material will be able to withstand increased loads. | Not very good strength. Large loads of claydite floor will not stand. However, pouring the basement base is still not an overlap device. As a rule, the basement basement does not provide for a large margin of safety for the floor. |
| Excellent inertness. In practice, this means that the stones in the composition of the concrete will repel moisture, rather than absorb it. Accordingly, the life of the floor increases. | The material absorbs moisture. On the one hand, this is good, because it seems to remain inside the stone, and does not fall into the room. But on the other hand it is bad, because if the humidity level is very high, the strength of concrete will begin to weaken. |
| Affordable price. | The cost of expanded clay can not be called low. |
| Bad thermal insulation characteristics. | Excellent thermal insulation quality. Floors of expanded clay will be much warmer than with the use of rubble. |
| Great weight of material. This does not mean that it cannot be used to fill the basement floor, but working with this stone is purely physically difficult. | The material has a very low weight, which allows you to work with it yourself without any particular physical exertion. |
So, what conclusion can there be? It's simple. If the basement is sufficiently dry and it is planned to use it as a living room, then concreting the floor in the basement is better to do with expanded clay.

Tip: if there is a need to obtain high thermal insulation characteristics from the floor, but clay cannot be used because of high humidity, then you can cheat. Fill the floors on the basis of rubble, and from above, warm the concrete with polystyrene foam.
If a room with a high level of humidity in the future will not be used as a living space, then the best option is to use crushed stone.
It turns out that we have dealt with the choice of filler, now let's consider the scheme of work. Note that regardless of the type of filler, instructions for pouring concrete floors will be the same.
Let's start.
Fill the floors
Before concreting the floor in the basement you need to stock up on such tools and materials:
- Buckets, shovels. Not be superfluous and a large trough to prepare a solution.
- Armature and grinder for cutting these rods. The rods themselves are needed for the manufacture of the frame - with it the base will be more durable and, accordingly, will last longer.
Please note that the reinforcement edges will have to be buried in the walls, and for this, naturally, they must have holes at least 10 centimeters deep. If you have solid concrete blocks of basement walls according to GOST 13579 78 or bricks, you will have to purchase (or rent) perforator for drilling holes for reinforcement.

- Roll of thick film. We will lay the working mixture on it.
- Two meter rule with level and guide beacons.
And, of course, we need cement, sand, water and a mixture filler (that is, crushed stone or expanded clay).
Now go directly to work.
Surface preparation
The preparatory work consists of the following points:
- We remove from the draft base all the garbage like paper, bags, etc.
- Fall asleep on top of the ground some amount of sand. Sand is needed here in order to even out the relief of the subfloor. It turns out that on a relatively flat plane, it is easier to fill in and the concrete leaves less.
- Трамбуем песок.
- We lay the film on the resulting plane with a small "inversion" on the walls.

Go to the next step.
Assembling the frame of reinforcement and installation of beacons
We measure the width of the room from wall to wall, add 10 centimeters on each side and, in accordance with the figure, begin to cut the reinforcing bars. As a result, we should have a “grid” of reinforcement with a cell size of about 60 to 60 cm.
When the required number of rods is ready, you need to punch through the concrete blocks for the walls of the basements according to GOST. To do this, the drill is taken with a diameter slightly larger than the diameter of the rods and the required number of holes is drilled and the reinforcement is plugged into them. At the intersection of the rods, the metal is tied with ordinary steel wire.
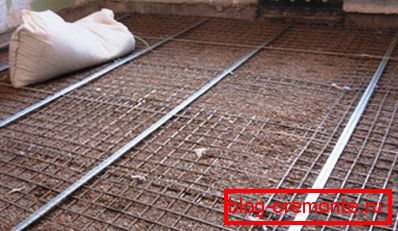
Pay attention to the fact that during such work it is not recommended to connect “intersections” by means of welding, since during shrinkage of the finished mass the metal frame will not be able to move inside the concrete. And this will lead to the appearance of cracks on the finished base.
After the frame is assembled, it is necessary to objectively assess whether any communications will take place on the horizon line. If so, then you may have to make holes in the wall in advance and insert pipes or something else into them.
If you have wide concrete blocks and it is difficult to make the necessary opening with a conventional punch, then pay attention to such a service as diamond drilling of holes in concrete. For fairly reasonable money, you will quickly make a hole of any diameter, even in very strong concrete.
Now you need to install the guide beacons, which will be a guideline of how much we pour the mixture and at what level you need to stop. Simply put, with their help, you can make a very flat final plane.
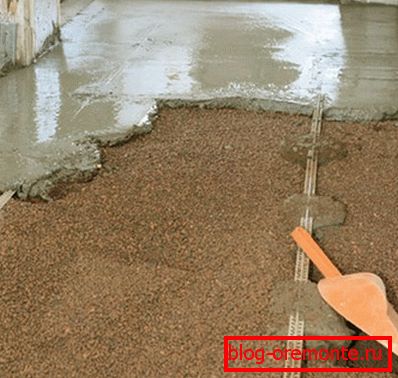
Beacons are installed as follows:
- Determine the point of the desired horizon. In this place impose a pile of solution.
- Using the level, focusing on the length of the beacons, we make another slide as if from the other edge of the rail.
- We set the bar on the slides, adjust the correctness of its position and leave the solution to dry.
- When the mixture is dry and the rail has turned out to be firmly fixed, we make intermediate slides, and after they dry, we put the required number of beacons in the same way (parallel to each other). The distance between them should be about a meter.
When everything hardens, you can work with beacons.
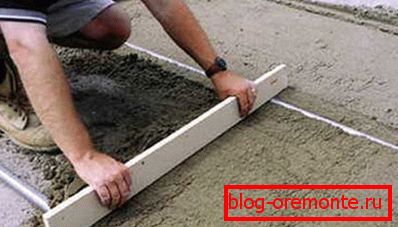
Knead the solution, pour it between the lighthouses and using the rule as if we stretch the mixture between the slats over the entire basement area.
After drying the concrete floor, if necessary, you can make a finishing cement-sand screed without the use of rubble and expanded clay.
Now briefly consider how to do a standard concrete staircase to the basement with your own hands.
Making a staircase with railings
The staircase will “pass” from the concrete floor to the opening in the ceiling.
Tip: if there is still no opening in the slab of the first floor, then such technology as cutting reinforced concrete with diamond circles will be relevant. As a rule, this service is provided in each more or less large city. The advantage is that you will do everything very quickly and accurately! That is, the opening will be exactly the size you order.
For its manufacture, we need concrete based on crushed stone and relatively thick reinforcement, as well as film and boards for installation of formwork.
- We make a plane from boards, a slope from the opening in the ceiling to the floor - this will be the direction and the bottom of our stairs. At the same time the distance between the boards should be minimal.
- Lay the film on top of the slope.
- From the same boards we make supports for the bottom of the future ladder.
- We measure the width and length of the future march and cut off as many boards as there will eventually be steps.
- We put the chopped boards "on the edge" along the entire span and fasten them securely. These will be the front walls of each step.
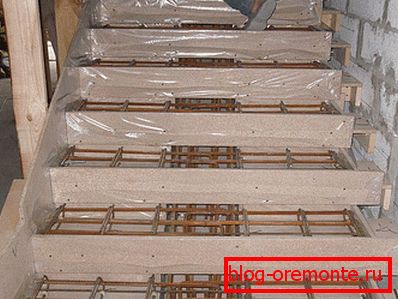
- If necessary, we drill holes in the boards that are set “on the edge” and pull the reinforcement through them from top to bottom. Armature should be a lot - the bars should be located parallel to each other. In this case, the distance between them should be approximately 30 centimeters.
- Now from each step you need to release up a piece of reinforcement so that you can later “attach” to the metal - that is, weld the railing. This is done simply - a small piece of the rod is cut, bent at an angle (taking into account the degree of inclination of the opening) and attached to the main fixture.
- The solution is mixed, and the entire space of the formwork is filled with the mixture.
Well, after the concrete has stiffened, the formwork boards are removed and railings are welded to the pieces of the reinforcement - the stairs are ready for operation.
That's all, an overview of the technology of the device floor and the simplest concrete stairs in the basement is completed.
Let's sum up.
Conclusion
We have dealt with in some detail about what and how the basement of the floor is made in the basement and how you can make the simplest solid staircase with railings. We hope that now you have a good idea how to fill the floor with concrete in the basement so that the result is of the highest quality. If you want to know even more information on this topic, then check out the additional video in this article.