Concrete tray for water drainage: types, standards,
What are the concrete trays for water drainage? We have to get acquainted with their species and find out how and by what standards they make the products we are interested in. In addition, we will find out if it is difficult to install a concrete gutter tray with your own hands.

Purpose of use
Why do we need a catchment and drainage trays laid on the surface?
- For removal of rain and melt waters from the base. Scum under the blind area and the more drawdown of the house is unlikely to please the owner.
- For draining the yard. In the first place - on the concrete plots or concretes laid out by paving slabs: where water finds its way to the ground, a dip is quickly formed.
- For drainage of the roadway, parking areas, open storage areas, etc.
Curiously: in addition to drainage, the industry produces reinforced concrete trays for laying pipelines for various purposes. They are used where there is a likelihood of damage to the pipes due to the displacement of the soil or large loads on its surface (a typical example is the laying of a heating main under the road).
http://strong-line.com/sites/default/files/20130819_093511_%D1%82.6+.jpg
Laying of the heating main.
Kinds
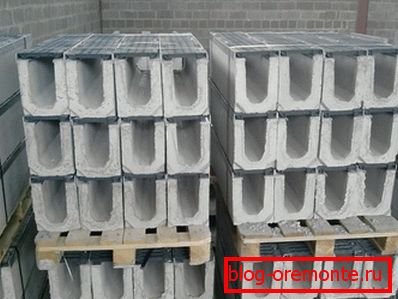
What are gutter concrete trays?
| View | Special features |
| Linear | Used for arbitrary laying without reference to the boundaries of the site. As a rule, it is closed with a grille to prevent injuries to passersby and debris from entering the tray. |
| Seductive | As the name implies, is laid along the edge of the road or section. It has a shallow depth and lack of a protective grid. |
| Telescopic | Used with a significant slope drain. Fragments of the tray when laying partially overlap. |

Production
The main function of the products we are talking about is the transportation of water. Obviously, the concrete must be as waterproof as possible, which implies its high density. Cold resistance is also welcome for obvious reasons.
Indeed, the production uses only heavy concretes, which are additionally compacted by vibration.
Vibrating casting
The form with the future tray after pouring is placed on the vibrating plate. The advantage of the method is the low price of the equipment; however, when casting, the density of concrete reaches a maximum only at the periphery of the form. In addition, the complete production cycle of a single product takes up to a day, which makes this method rather unprofitable with large production volumes.
Вибропрессование
Vibropress increases the density of concrete to the maximum possible throughout the volume, thereby increasing the water resistance and frost resistance of the product. Pressing duration is only two minutes; Moreover: the tray can be removed from the mold immediately after processing, which additionally increases the manufacturability of the production cycle.
Standard
Собственного нормативного документа, регламентирующего производство именно водоотводящих систем, не существует. Однако любой водосборный бетонный лоток должен производиться в соответствии с требованиями ГОСТ 13015 - 2003 «Изделия железобетонные и бетонные для строительства».
What are the requirements for this product?
Let's highlight the key points.
- Cracks of any kind and size are prohibited.
To clarify: the standard allows for the presence of minor cracks that appear due to the compression of concrete at prestressing the reinforcement. However, trays for pre-strained products do not apply.
- The armature should not go outside. Allowed only the withdrawal of mounting reinforcement releases; However, this is not our case - the reinforcement cages of the trays are not combined during installation.

- Fat and rust stains are not allowed.
- Concrete used in the manufacture of products must comply with the requirements of GOST 26633.
- The release strength of concrete must be at least 50% branded for concrete class B15 and above and not less than 70% for concrete class B12.5 and below.
Piling
As a sample of the installation technology, we will provide instructions from one of the domestic producers of concrete products - the company Angara Reinforced Concrete Products.
- On the ground is laid out the plan of the drainage system, the location of trays and wells.
Nuance: like any gravity drainage system, drainage system needs to be biased. A reasonable minimum is considered a slope of 2 centimeters per linear meter. With a smaller bias or in his absence, the tray will be constantly clogged with debris and overflow.
- The trench comes off, the bottom of which is covered with sand. The filling is compacted by tamping or watered with plenty of water for maximum shrinkage.
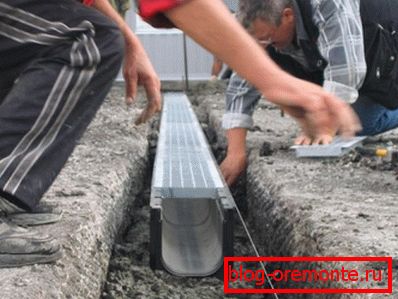
- A concrete pad is laid over the bed.. Trays are set end-to-end or (in the case of telescopic products) with lining of the edges on wet concrete.

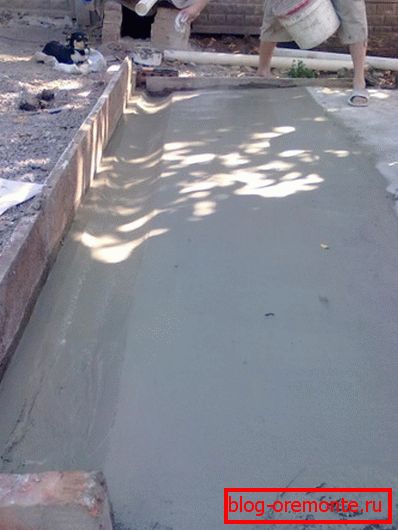
- Free space in the trench is concreted. Как и в случае подушки, используется низкомарочный бетон (M100).
- Joints are sealed with cement-sand mortar.
Tip: adding a small amount of liquid glass to the solution will increase the watertightness of the seams.
On turns, trays have to be cut in place. This work can be done with a conventional grinder with a circle on the concrete; however, professionals prefer to work with diamond tools. Cutting reinforced concrete with diamond wheels allows reinforcement to pass without a tool change; In addition, diamond cutting and diamond drilling of holes in concrete leave perfectly flat edges.

Monolithic tray
The relative high cost of high-quality reinforced concrete products often makes them look for cheaper alternatives.
In our case, such an alternative would be a monolithic tray, filled in place.
- We tear off a trench with a width and depth of about 20 cm.
- Fill up its bottom with sand by 5 cm. Seal the bedding.
- Заливаем полутораметровый участок бетоном марки M150 - M200. При самостоятельном приготовлении для дозировки компонентов можно воспользоваться таблицей:
| Brand of concrete | The ratio of cement, sand and rubble |
| M100 | 1 : 4,6 : 7 |
| M150 | 1 : 3,5 : 5,7 |
| M200 | 1 : 2,8 : 4,8 |
- We put in a fresh concrete two-meter sewer pipe with a diameter of 110 mm so that it is immersed to about the middle. We expose the required slope by level, after which we press down the pipe in several places in order to prevent concrete from squeezing it out onto the surface.
- After the concrete has set, we pull out the pipe and proceed to the next section.

Conclusion
We hope that the recommendations presented to the reader will be useful. As usual, the attached video in this article contains additional thematic materials. Successes!