Concrete foundation - arrangement on the ground. interfloor
Despite the appearance of many modern materials, most of the bases are still made of concrete. There are several reasons for this, first of all proven reliability and durability. Also of great importance is the versatility, installation of a log on a concrete base, flooring or floor heating, everything is possible only with well-equipped basis.
There are several mounting options and almost all of them can be made by hand.
Arrangement of structures in the house
Supporting structures made of concrete in an already constructed house are usually made for arranging the floor. In some cases, such a support may be poured under stoves or fireplaces, but the technology and general installation instructions are similar.
Ground floor installation
Let's start with the most difficult when the box is already removed, so that the house does not pull moisture from the ground, it is desirable to lay a solid foundation for the floor of concrete.
Tip: immediately decide what kind of topcoat and what is the thickness of the overall "cake" of the floor. This is important, because if you plan a thick topcoat, such as a wooden floor on logs or a heated floor, then it may be worthwhile to remove some of the soil so that later the ceiling does not decrease.

- Initially, the ground is leveled and well compacted, of course, it is best to use special electric vibrating rammers. But in the absence of them, the old-school method will also be suitable, using a log cut and a bar nailed to it. Hard, but effective.
- Next, fall asleep pad of sand, at least 100 - 150 mm. It is better to take sand with a high content of clay. This pillow is periodically poured with water and is also well tamped.
- The next layer of dumping is classically made of gravel or crushed stone with a fraction of 5-20 mm.. But lately, many craftsmen have begun to use expanded clay, we do not share this approach, expanded clay is a good material, but as a heat insulator it is better to stack it later. Plus, its price is higher than that of rubble. This layer should also be compacted.
- Further, the crushed rubble is tightly covered with a waterproofing layer, it is necessary that the moisture from the soil does not penetrate the upper screed or the walls of the house. The range of materials here is quite wide, it can be polymer films or roll materials. The most affordable is technical polyethylene. The canvas overlaps by 150 - 200 mm and with approaching the walls, up to the height of the finishing screed.
- The waterproofing is filled with a draft concrete screed, not less than 70 mm thick. The solution is mixed with coarse filler, here it is already advisable to use expanded clay, and the use of rubble will not be a mistake either. Precise alignment is not required here, but the height difference should not exceed 4 mm.
- After solidification of the draft screed, it must be covered with a layer of vapor barrier. The best indicators show polymer-bitumen membranes. But it does not matter, here you can make any vapor barrier material.
Arrangement of interfloor screed
From this moment, the device of the concrete base for the floor on the ground and the floor on the interfloor ceilings is almost the same.
- After laying the vapor barrier on the rough construction, the structure can be mounted differently depending on what kind of finishing is planned. For a wooden floor on logs, it is enough to install logs, between them put the chosen heater and sew it with a floorboard.
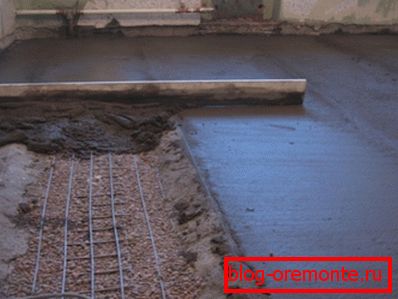
- If you plan to plywood flooring on a concrete base or arranging a heated floor, then you will need to pour a finishing screed from concrete.
- Often at this stage the floor is being heated, but the procedure is not mandatory, especially for interfloor floors, where the floors are not so cold. In other cases, it is better to use extruded polystyrene EPRS as a heater, but foam plastic is sometimes used to reduce the cost. For installation of a warm floor is taken insulation covered with foil, it is better reflects the heat.
Important: at this stage we recommend to mount a damper tape around the perimeter of the room, it compensates for the movement of concrete when it cures.

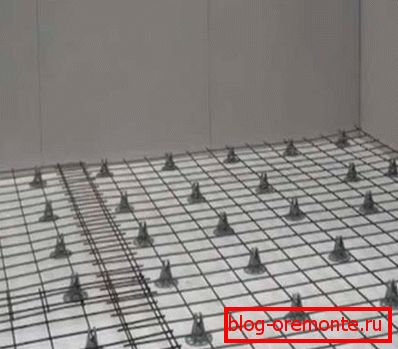
- A reinforcing mesh is laid on the vapor barrier or insulation. It can be metallic or fiberglass. There is an option when the reinforcement is performed by adding fiberglass directly to the mortar, but this option is for professionals, since if the proportions are wrong, the concrete will crumble after solidification.
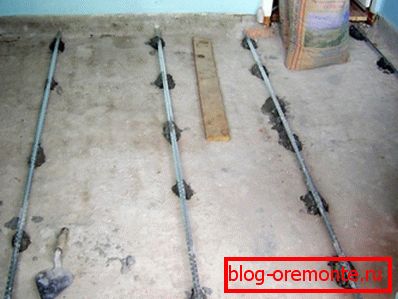
- At installation of a heat-insulated floor, at this stage heating elements keep within. Then you need to install the beacons of the metal profile. Beacons are installed on the screws and fixed solution. The span must be slightly less than the width of the rule. The profile is fixed with a step of 30 - 40 cm, and at this the preparation of the foundation for concreting ends.
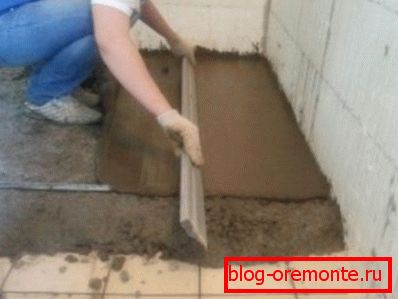
- The solution is made of cement-sand mixture 1: 3, we advise you to add anti-shrink plasticizers. The solution is laid out on the floor surface and slightly leveled with a trowel. Then the rule, based on the beacons, the surface is aligned to the ideal state.
Tip: if the concrete screed is made as a topcoat, then it will still need to be sanded after curing. If you plan to install the next layer of the floor, then we advise you to iron by sprinkling wet concrete with a thin layer of dry cement.
Laying on the street

In private construction, on the street most often a concrete foundation is laid for laying paving slabs.
This method is considered more durable and can withstand heavy loads.
- The laying technique is similar to the laying of the base on the ground described above. But here everything is done a little easier - the thickness of the blind area is about 250 mm. After tamping the soil, geotextiles or any waterproofing are laid on it, and then a cushion of gravel or crushed stone is made for concrete and is also tamped.
- After that, a well-reinforced concrete screed with a slope of about 1 ?, 1 linear meter is poured over the beacons. When the array hardens, paving slabs can be laid on the plane.

Tip: when arranging the foundation for laying paving slabs, as a formwork, it is better to use curbs. They are laid similarly on a concrete base, but 10-15 mm below the level of the tile, so that water flows down.
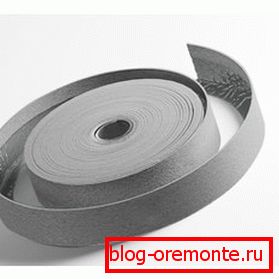
- If you pour a concrete screed in a room with a large area, then besides the damper tape around the perimeter, experts advise you to cut damper joints, to compensate for the stress when the concrete hardens.
- The seams are cut in problem areas and throughout the area in squares of about 1 - 2m ?. Depth 1/3 of the thickness of the fill. After cutting the seams are sealed with polymer sealants.
The video in this article shows some of the subtleties of the base arrangement.
Conclusion
As you can see the concrete base, settling down is quite simple. Of course, this work cannot be called easy, but if finishing facing often requires high professionalism, this can be done by hand, saving considerable funds.
