Concrete floor in the bath: construction technology.
Why do so many of us like to sit in a bath after a hard day at work or on a day off? Here you can forget about problems, and at the same time strengthen your general well-being. And if they decided to build their own relaxation zone, then this article will discuss how to properly make a concrete floor in a bath so that it can last for a long time without repair.

Construction technology
Training
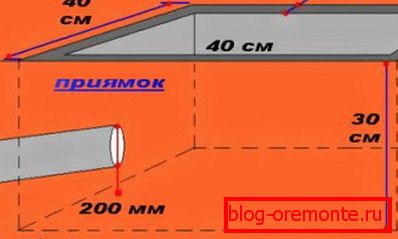
If you decide to install a bath on sandy soil, you should first make a drainage pit for the water flow under the washing. Subsequently, it will quietly soak into it.

On clay soil, you need to dig a small pit, from which to make the pipeline. Its main function is to discharge dirty water into the cesspool.
Tip: At the end of the pipe, make a shutter that will prevent unpleasant odors from entering the gutter.
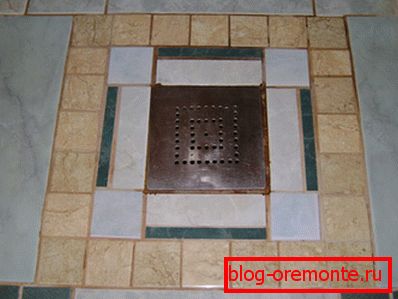
The walls of the pit are recommended to be tiled or concreted to a height of 50 mm. Do not forget to put a metal grill over it.
Making the base for the floor
The following is a detailed process instruction:
- Tamp the ground and make a slight slope towards the pit. Pour a layer of rubble 150 mm high onto it.

- Along the perimeter, place a clay ball and seal the entire surface again..
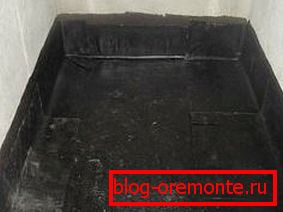
- Make the concrete layer double, then there will be no cold in the washroom and the steam room from the floor. The first layer should be no more than 50 mm high. In places where the concrete joins the walls, fill the joints with bitumen, so you will avoid water leaks.

- Put an insulation layer after the first layer hardens (you can use ordinary felt or mineral wool, its price is quite acceptable). Wrap it in a ruberoid so that the material does not get wet.

- Fill the second layer, at the same time it is necessary to reinforce the concrete, for example, with a netting sling, and tamp it down. Apply cement mortar to the surface and then level it carefully.
Preparing the solution
In this case, it is best to use the expanded sand, which gives strength to the concrete surface. In addition, perlite has good thermal insulation performance, so it is well suited for this floor.
| First stage | To prepare the solution in the mixer: · Pour 2 buckets of sand; · Pour 10 liters of water; · Mix the mixture; · Add 5 liters of dry cement; · Mix the solution for 5 minutes; · Add 5 liters of water to the mixture; · Stir the solution again. |
| Second phase | After the solution is homogeneous, add 10 kg of perlite and 2 liters of water to the concrete mixer. Stir the solution until it forms a flowability. Disconnect the mixer for 10 minutes and do not add any components there. Run the equipment again and stir the mixture until excess liquid is released from it. The solution should be plasticine. In this form, it is ready for use. |
| Third stage | Apply the mixture on the prepared surface of the floor of the future bath. Complete the screed, level it, not forgetting the slope to drain water. It usually freezes within 5 days. |
Tip: there are times when it is necessary to dismantle old concrete structures, in this case cutting the reinforced concrete with diamond circles of the required density will help.
Recommendations for the manufacture of screed
- An important point - correctly calculate the volume of the material, usually 1.5 m.2 There is 1 bag of cement. All the necessary tools for the work can be bought in specialized hardware stores or on the market.
- If you decide to put a tile, it is recommended to use a special self-leveling screed as the base. It consists of ordinary cement, gypsum and anhydrite.
- It is necessary to begin pouring the screed from an angle that is as far as possible from the entrance. To do this work you need 2 people. One will carry and deliver the solution, and the second will perform work on pouring the screed.
- The excess solution must be shifted to the entrance, where it is not yet, the work should not be interrupted. After laying the first layer immediately begin to lay the second. After completion of work it is necessary that the screed is frozen.

- After 1-2 days, you may notice that the screed dries. Remember, it is not possible to walk on it yet; pause for at least 7 days. But after that it is advisable not to exploit the surface for another 2-3 weeks.
Tip: as the screed dries, it must be sprinkled with water several times a day. This will prevent surface cracking.
- If you do not have time to wait for the concrete to dry so long, you can add additional components, plasticizers, to the prepared solution. They bind all the components of the prepared solution. In the future, this prevents cracking of surfaces, and plasticizers themselves increase the durability and strength of concrete.
Advice: if you need to make a communication channel in a concrete floor, diamond drilling of holes in concrete with professional crowns will help you.
- Check the quality of the work done after a long drying is easy:
- the uniformity of the screed can be determined by its color - if the floor surface is monotonously gray, then the solution has been prepared and filled in correctly;
- The strength of the coating can be determined with a hammer - if there is almost no trace of a good hammer blow to the surface, the solution is prepared and filled correctly
- the quality of the coating is still determined by the gaps - if they are less than 4 mm, then the floor and the screed are made correctly.
New technologies
Modern construction work offers new ways to create a concrete floor. In some cases, you can apply the laying of ceramic tiles on the insulating material without manufacturing the second concrete layer.

In this case, you should strictly follow the recommendations of the construction process. For example, if you prefer a mineral wool heat insulator, use mats of the required brands, where the strength and thermal insulation parameters are the same as those required.
The method is simple:
- Arrange the waterproofing layer on top of the insulation.
- Make a screed from a special cement composition. Its characteristics should allow with a layer thickness of 15-20 mm to be a reliable basis for the finishing coating of ceramic tiles.
- Glue the tile itself to a very thin layer of glue fixing each element on the floor.
Conclusion
Reliable concrete floor in the bath is a guarantee of its safe use. In addition, it provides an opportunity to extend the life of the structure. During the acquisition of materials should be preferred higher quality and fresh.
The video in this article will help you find additional information on this topic.