Concrete floor in the apartment: self-laying
Many novice builders are often interested in how to make and how to warm the concrete floor in the apartment. In fact, the technology does not involve performing complex operations, and therefore can fit almost anyone.
In the article, we present an algorithm for performing the main stages of installation, following which you can fill the floor with your own hands, spending not too much effort and money on it.

Features of arrangement
If we talk about the use of concrete in residential premises, then experts adhere to this point of view:
- As a base, concrete can be used wherever the bearing capacity of the ceiling allows. Of course, the insulating characteristics of the material are low, but due to the use of modern heaters, this disadvantage can be compensated.
- As for the finishing coating, from this point of view, concrete in the interior of the apartment is not the best choice. Even after processing with decorative compositions and thorough polishing, the surface is quite unattractive. In addition, high thermal conductivity leads to unpleasant sensations when walking.
Note! This does not apply to outbuildings: a concrete polished floor would be appropriate there.
- As a result, the replacement of a wooden floor with a concrete one in an apartment will be justified only if it is planned to lay decorative floor coverings on top of it. It is also desirable to equip the heat insulating circuit, because the multilayer floor structure is optimal.
Instructions for the construction of such a structure is given below.

Manufacturing technology
Foundation preparation
When working in an apartment located in a typical panel house, the preparation process is extremely simplified:
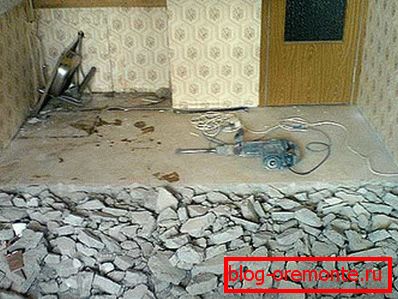
- First, dismantle the flooring.
- Then we take a punch with a bit-chisel and remove the old tie. Usually its power is about 50 mm, so this process is rather laborious.

- Then we remove all construction waste and we sweep away the bulk of the dust. We must have a clean concrete ceiling, which we process with waterproofing mastic.
- When arranging a concrete floor on the ground in a private house, you will have to work a little more actively: first, ram the earthen base, and then we put a pillow from a mixture of sand and gravel on it.
Note! The floor on the ground requires a better moisture protection, so we lay several layers of polyethylene over the gravel backfill. The price of coverage, of course, will increase, but the reliability of waterproofing will be much higher.
- On the walls of the room around the perimeter we glue a damper tape, which will prevent the destruction of concrete during thermal deformations.

- When laying floors on large areas, damper lines should also be laid in open areas. Sometimes for this purpose, cutting of reinforced concrete with diamond circles over an already frozen floor is used with filling of the obtained expansion joints with elastic polymers.
Fill layers
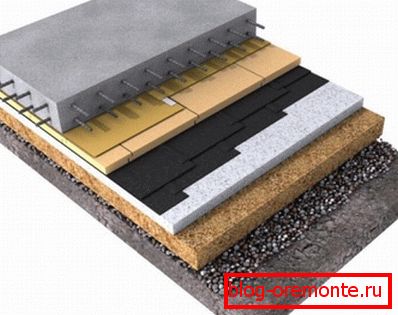
Further, the instruction recommends pouring two layers of concrete with a heat insulating belt.
This is done like this:
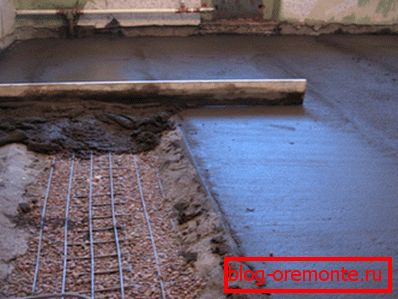
- We place reinforcing mesh welded from steel bar with a diameter of up to 8 mm on the base. In order to place the reinforcement in the middle of the filled layer, we place it on special supports.
Tip! It is necessary to foresee in advance where the communications will take place and install embedded steel pipes in these places. Otherwise, it may be necessary to drill the holes in the concrete using expensive professional equipment.
- Then fill the roughing screed. To do this, you can prepare the concrete yourself, and you can buy ready-made composition. The second option is preferable if it is necessary to simultaneously perform the laying of floors on a large area: we ourselves simply will not have time to mix this solution.
- This recipe is most often used: for 1 part of cement we take 2 parts of sand and 4 parts of rubble. The resulting mixture is diluted with water to a state of fluidity: we need the solution to be poured without much effort.

- The flooded material is qualitatively treated with a bayonet spade or vibratory compactor, so we will make the concrete structure more uniform and remove excess air bubbles.
- After the draft screed gains sufficient strength (it takes up to 7 - 10 days), we can start warming. The best results are demonstrated by the laying of plate heat insulators, such as extruded polystyrene foam.
- As an alternative to foam polystyrene insulation, it is possible to use loose substances (expanded clay, perlite), but this is problematic in an apartment. Arrangement is quite effective in terms of thermal insulation layer leads to a strong rise of the floor.
- On top of the insulation we lay the membrane and pour a fine cement-sand screed along the beacon rails. Before leveling it completely, control the plane of the resulting floor with a level.

- A prerequisite is the reinforcement of the finishing screed, since it will take all the loads. For reinforcement we use stainless steel wire mesh about 5 mm thick.
In principle, the most time-consuming phase of work at this end. However, to achieve optimal results, it is important to correctly perform all final operations.
Surface leveling
После того как чистовая стяжка залита, нам необходимо подготовить основание к укладке напольного покрытия и эксплуатации (читайте также статью «Маркировка бетона и изделий из него: учимся читать символы»).
For this:
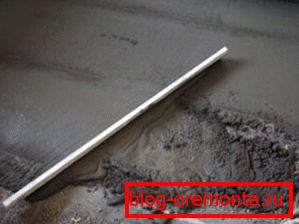
- While the cement has not yet seized, level its surface, trying to achieve a perfectly flat plane. The better we perform this operation, the less the fuss will be with the floor after the solution has hardened.

- Having wiped the surface with the help of metal semi-sockets wetted in water, let the floor dry. So that the moisture evaporated not too quickly, and the cement managed to gain strength, we covered it with polyethylene.
Tip! The optimum temperature for cement hydration is 200C. It is advisable to provide a stable microclimate for the entire duration of floor drying.
- As a rule, it takes 28-30 days to fully strengthen the concrete. However, the work is usually continued within three weeks after casting.
Then you can act in two ways:
- First, some prefer to lay the flooring directly on the cement. To do this, it must be leveled using grinders. This process is very laborious, but the resulting base will be very strong.

- Secondly, you can get a flat plane either using self-leveling compounds, or by mounting the plywood board. The strength of the base under linoleum or laminate will slightly decrease, but all operations can be performed much faster.
After the completion of this treatment, we will only have to decide how to cover our new floor.
Conclusion
Бетонная стяжка в квартире является хорошим основанием практически для любого напольного покрытия. Чтобы сделать ее достаточной прочной и качественной, стоит следовать рекомендациям, приведенным в тексте, а также изложенным на видео в этой статье (см.также статью «Бетонные колпаки для столбов забора – виды и использование»).