Concrete floor in a private house: the necessary materials.
How to pour concrete floor in a private house with your own hands? We have to formulate the tasks before us, find out what problems may arise in the process of work, and find suitable solutions for them. So let's get started.

Requirements
- Concrete floor is arranged solely on the ground.. For wooden beams, it is simply too massive.
- Concrete floors on the ground in a private house should not be poured with a high level of groundwater (less than 2 meters from the surface). Providing an absolutely effective waterproofing of concrete is problematic; the constant dampness in the room will hardly please the owner.
To clarify: there may be compromise solutions, including the creation of an effective drainage system. However, the relevant activities are usually performed at the construction stage.
- Concrete has a high thermal conductivity.. A layer of thermal insulation is required.
- Most soils cannot boast of a density sufficient to lay concrete directly on their surface.. Under the draft of the screed required bedding.
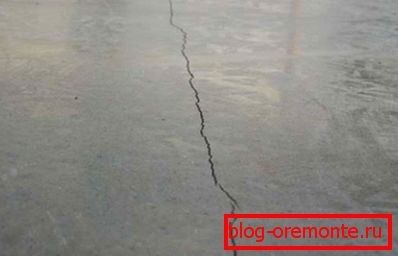
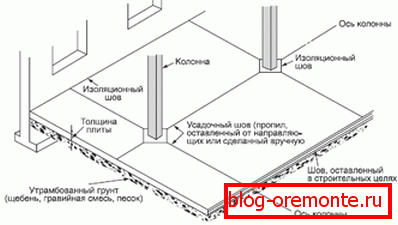
- Uneven shrinkage during soil movement, temperature changes, etc. inevitably lead to cracks in the monolith. Concrete floors in a private house are poured with shrink seams; as an option - the seams are cut in the screed after gaining her strength.

Materials
Structure
What will the cake of the future sex consist of? Move upwards.
| Layer | Function |
| Compacted soil | It assumes the main load from the floor and the partitions standing on it. |
| Sand | Provides drainage, prevents frost heaving in the freezing of the soil under the house. |
| Rubble | Distributes the load on the maximum area of the sand bedding, prevents drawdown. |
| Waterproofing | It protects the rough screed from capillary suction of water, contributes to the strength of the concrete (cement milk remains in the thickness of the screed, and does not go into the ground). |
| Roughing screed | Separates insulation from bedding, performs carrier and protective functions. |
| Heater | Provides thermal insulation of the room. |
| Waterproofing | Provides additional protection from capillary suction, prevents the flow of cement milk finishing screed in insulation, accompanied by a drop in its insulating ability. |
| Finishing screed | Provides maximum bearing capacity of the floor, is the basis for the finish surface. |
Description
Now we will analyze each layer in more detail.
Priming
The chernozem is chosen to the dense basis; sandy loam and loam is enough to level and tamp.
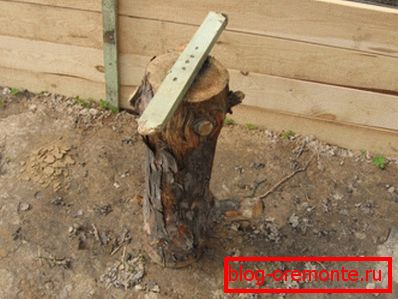
Hint: the simplest manual tamper is constructed from a piece of a log or a bar with a handle fastened to it from an ostrugannogo bar.

Sand
Quarry or river sand is suitable. Purity and fraction does not matter. For maximum shrinkage, the sand is again rammed or simply spilled with plenty of water.
Layer thickness - 10 - 15 cm.
Rubble
As a rule, a fraction of 30-50 mm is used. It is strongly not recommended to use crushed rock sedimentary (limestone, shell rock). The instruction is related to its low mechanical strength and high shrinkage under load.
The thickness of crushed stone bedding is the same 10-15 cm.
Waterproofing
In this capacity, dense polyethylene is usually used. High density is needed just so that the material does not break under the weight of the roughing screed on the sharp edges of the gravel.
Roughing screed
Reinforcement for it is not necessary. The thickness of the layer is about 10 centimeters. The material used is concrete of low grade (as a rule, M100).
We give the composition of the most popular brands of concrete. It will be useful for self-cooking.
| Brand | Proportions (cement grade M400: sand: crushed stone) |
| M100 | 1 : 4,6 : 7 |
| M150 | 1 : 3,5 : 5,7 |
| M200 | 1 : 2,8 : 4,8 |
| M250 | 1 : 2,1 : 3,9 |
| M300 | 1 : 1,9 : 3,7 |
Heater
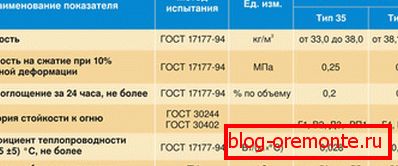
The main requirement for it is a fairly high compressive strength. For insulation using foam density of C-35 or, better, extruded polystyrene foam.

The thickness is determined by the climatic conditions of the region; As a rule, 50 mm of foam are considered to be the norm for the southern regions of Russia, 100 mm in the middle lane, 150 mm in the Far East and the Far North regions. The thickness of extruded polystyrene foam is 1.2-1.5 times smaller.
Waterproofing
The second waterproofing layer can be made of the same polyethylene or two layers of roofing material.
Finishing screed
Material - concrete M200. For reinforcement, a steel mesh is used (preferably galvanized, although its price is slightly higher) with a mesh of 10–15 cm and a wire thickness of 5–6 mm. Screed thickness - 8 - 10 cm.
Work order
How to make concrete floors in a private house from the listed materials?
In general, after studying the structure of the floor, the order of operations is rather obvious.
- The soil is removed taking into account the thickness of the cake floor, leveled and rammed.
- One by one, two layers of bedding are laid out and compacted.
- The strips of polyethylene are laid with overlap and taped.
- Laying out and leveled roughing screed.
- After it is completely dried without gaps fit insulation.
- The second layer of waterproofing fit the same as the first. The edges bend up and untie the screed from the walls; A thin strip of insulation is used as a damper to counteract the transmission of acoustic vibrations.
- On top of the waterproofing on the supports with a height of 1.5 - 5 cm, the reinforcing mesh is laid, after which a finishing screed is laid on the beacons.
- The last stage - cutting shrinkage seams after setting the screed. Concrete is cut to a depth equal to 1/4 - 1/3 of the thickness of the finishing screed, in squares no larger than 3x3 meters. The ideal solution is to cut the reinforced concrete with diamond circles; as well as diamond drilling holes in concrete, it will leave perfectly smooth cutting edges.

Please note: the same result can be achieved by laying demarcating slats in its surface layer during pouring.
Conclusion
We hope that the recommendations presented to the reader will save him from mistakes in the process of repair and construction. As always, the video in this article contains additional material on the topic under discussion. Successes!