Bath from a bar with your hands 3x6: the basics of
In the construction of the bath, you can always use a lot of materials, but it is wood that remains the highest priority option.
Still, a sauna from a bar with your own hands 3x6, for example, is a kind of “classic”, and using the bar as an example, you can see how the bath is being built from scratch.
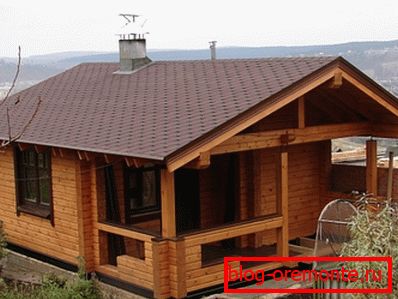
We build from scratch and on our own
Naturally, the question arises, why is timber, is there a log?
And here you can easily bring several main advantages of choice:
- The timber is very easy to stack, and this is important for independent work.
- Material practically does not shrink.
- Sufficient insulation. Wood is generally an excellent material, and timber type also allows to reduce heat loss as a result of dense joints.
- The timber can be immediately laid on the foundation, it is assembled according to the masonry principle, and, unlike logs, it does not require preliminary logging.
Note! The simplicity of the work ultimately affects the cost of the entire structure, because the ability to assemble on its own can seriously save.
Of course, the advantages of such a bath can also be attributed to the fact that the price of a bar is relatively small, which also has a positive effect on the overall estimate.

Nuances
Before starting construction, it is necessary to clarify some nuances:
- To work fit profiled timber.
- For the first crowns, and this is full of gladness around the perimeter, it is best to buy exactly larch timber. This breed is less susceptible to rotting in a wet environment.
- Starting with 3-4 crowns, you can switch to the use of spruce, or pine. Due to the high resin content in such rocks, wood has better thermal insulation properties.
- For the load-bearing walls of the box, the most optimal section of the bar is 150x150 mm.
- For internal partitions in the bath, a cross section of 150x100 mm is perfect.
- Wood must necessarily be treated with antiseptics.
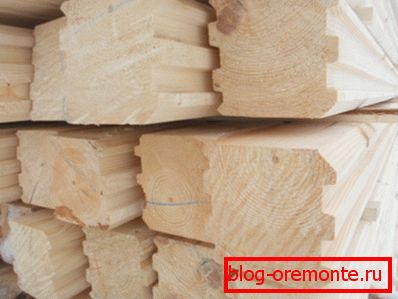
Note! The first crown is always processed completely from all sides, and subsequent ones can be processed from three sides. And by the way, motor oil remains one of the simplest antiseptic.
Training
Naturally, the first thing you need to do is prepare a site for construction, and if you intend to build a bath from a bar 3 by 6, then the site must be cleared a few more squares for normal and comfortable work.
Be sure to prepare the drainage pit, this can be done immediately, and not after construction.
Further, the choice of the type of foundation for log houses.
Here you can offer three options:
- Pile Quickly enough. It can be both screw and bored.
- Ribbon. A very simple type of foundation, which is just simply to be built on its own.
- Monolith. This is a more expensive option, but it allows you to make the very foundation of a functional, to install in it immediately and warm floor and communications.
Since the project of a 6x3 bath from a bar implies work on its own, the choice will fall on the ribbon type of the base.
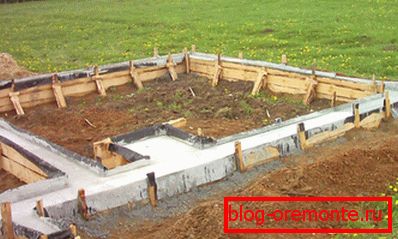
Step by step here work goes like this:
- Markup is made throughout the site.
- Excavation. The trench is the depth of soil freezing. This is the most correct option, it is 1.2 meters on average. Width is 30-40 cm.
- When everything is dug out, you can fill the sand layer to 100 mm, and carefully tamp everything down along the bottom of the trench.
- Next, fit the reinforcement cage, which under the baths of 6x3 timber can be connected from reinforcement with a section of 10 mm.
- And the last construction formwork.
- Next, the concrete is poured, and mortgages are left, which will be used for fastening with a bar.
Note! The foundation is always recommended to rise above the ground by at least 15 cm, and in the case of the bath, the wood should be just above the ground.
Walls
After 5-7 days, you can remove the formwork, and proceed directly to the construction of walls. Concrete is not yet completely dry, but it's not scary, you can already work on it.
And the first thing is sure to hold waterproofing.
There are two simple, but effective ways:
- Concrete treatment mastic. It can be applied with a brush.
- Laying a simple ruberoid in two layers.
Note! Before starting work, you need to be reminded that the material for the box is best chosen with a section of 150x150 mm. And yet, before you start laying the crown, all the material must be re-checked for evenness horizontally. The first crown is always set strictly according to the level, it depends on how smoothly the wall goes on.
Laying the first crown of the frame should begin with the fact that along the entire perimeter you need to place thin wooden slats 15 mm thick, the space between them is filled with mounting foam.

This is another kind of protection between the wood and the foundation, which should prevent the spread of moisture.
For the first row, the instruction assumes either fixing on mortgages, if any, or simply installing the beam. The fact is that many experts recommend not to use the fastener at all, but to leave everything to the "redemption" of the wall load, under which the box will shrink.
Several ways to build
The most common method of normal fastening of wood may be the method of installation of the dowel or pin.
It consists in the following:
- First, the wreaths are laid.
- Everything is level by level.
- The second row is laid.
- Holes are drilled in increments of one and a half meters.
- The hole passes through the top bar, and half the bottom.
- Top timber with his hands removed. The layer of insulation, nog, and the upper beam.
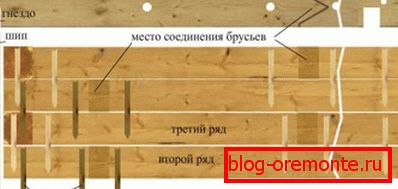
This is the way to mount all the crowns, except for the upper ones, where the mount will have to do with the roof.
In the second method, you can simply fasten the wood with long nails. However, it is necessary to hammer in a nail without a cap, in order to prevent corrosion from spreading between the crowns.
The third method involves the use of dowels - square bars, which are driven in a checkerboard pattern into pre-drilled holes. Here, the upper timber is also drilled through.

Windows and doors
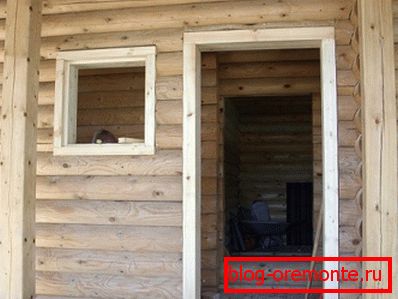
The door unit must be installed on the floor trim, and only with a plumb and building level! Projects of 6-by-3 baths always suggest several windows, albeit small ones, and everywhere you need to work with great precision.
Once the door frame is aligned, it can be fixed. The window openings are installed in the same way. Here in both cases it is necessary to leave a distance of about 80 mm under the blocks, this gap is needed for normal wood shrinkage.
In addition, subsequently, the joints between the blocks and the bar will need to be hammered with tow, or insulation. But this is done after the shrinkage of the entire structure.
Roof
The entire installation of the roof for such a structure as a bath from a timber 6 by 3 can be divided into main stages:
- On top of the wall trim fit beams in a strict horizontal position.
- They are mounted rafters, you can in 1 meter increments.
- You can put plywood on the rafters, if we are talking about soft tile, or make a crate under another roofing material.
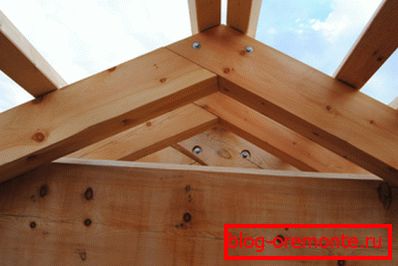
Note! This option assumes that all work on roof insulation will be carried out strictly from inside the sauna room already. In this type of insulation, you can use simple mineral wool, which fits between the rafters, and is fastened with straps to the plywood.
Conclusion
The 6x3 bar bath is ready, at least its main part, in the form of a foundation, a box and a roof. Next comes the finish, and this is purely individual moments.
Here, and the device porch, stove, and bathroom amenities. Basically, as you can see, working with a bar is quite simple, and building a bath on your own is easy. The video in this article will complement our story with visual points, look!